In the WSUS administrative console, you will find the Computers category. Here, there are all clients (endpoints) receiving updates via WSUS. Of course, clients can be Windows clients and/or Windows Servers.
Computer Groups are very important in a WSUS infrastructure, as you will be able to deploy only to the groups you want in a more methodical manner and then have the corresponding reports for each group separately.
By default, there are two computer groups, All Computers, and Unassigned Computers. When a client first communicates with the WSUS server, each client is added to the list of both these groups.
Create and manage computer groups
Besides the default groups, you can create as many computer groups as you think it is necessary to manage them more efficiently. The process is very simple.
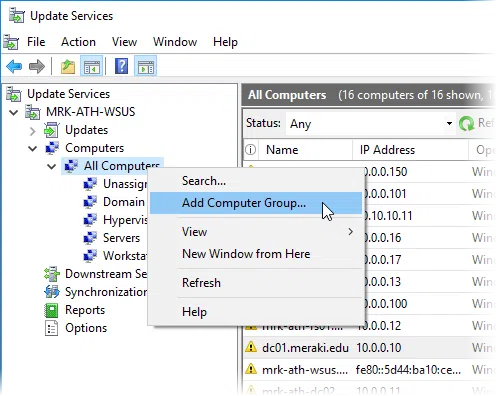
Right-click All Computers, and then click Add Computer Group.
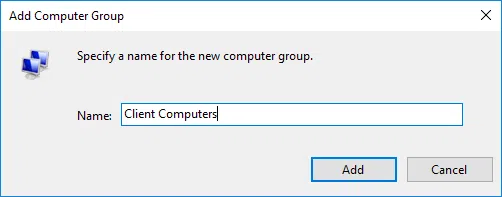
Enter the name of the group and click the Add button.
As shown in the above image, in my home lab I have created some groups based on the status of the individual client. How to separate your own groups and which clients will be included is at your own discretion.
Of course, in a productive environment, it’s a good idea to create a separate test group with some test clients to test the updates before deploying them across the infrastructure.
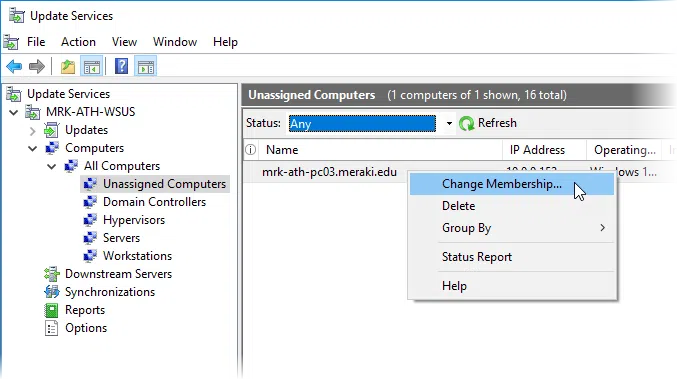
To transfer one or more clients to a computer group, right-click the client and then Change Membership.
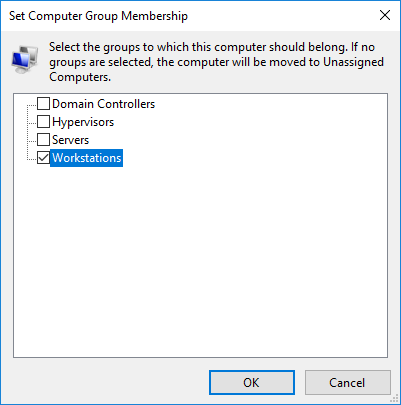
In the window that appears, select the computer group and click OK.
If you do not see a client in the list, select Any from the Status drop-down menu and click Refresh.
This so easy to handle in a small infrastructure, you create the groups, move the clients where you want and you finished configuring them. But what if there are hundreds of clients and should be added to different groups? Can we automate this?
In this process, we use Client-side targeting. Using Group Policy, we can define in which Computer Groups each client will be assigned to, based on the client-side targeting setting that we set up in the GPO. Let’s look at it in practice.
Configure client-side targeting via Group Policy
Open the Group Policy administration console, create a new policy, and click Edit to configure it. Then browse to the followin path.
Computer Configuration – Policies – Administrative Templates – Windows Components – Windows Update
Here, find the policy named Enable client-side targeting and double click or edit to set it.
Click on Enabled and in the Target group name for this computer field, type the name of the group that will assigned on the WSUS console. You can type more names by separating them with a semicolon.

As the note in the description says, this policy works only if you have enabled the Specify intranet Microsoft service update location policy.
Note: You will first need to create computer groups on the WSUS server and then add the clients through the group policy.
So, by creating different policies with the corresponding computer groups and applying them to separate Active Directory OUs, you can bypass the above manual management of clients in groups. Also, if you add a new client to an OU in the future, then it will take the corresponding policies and updates from the WSUS server without having to do so through the WSUS administrative console.
Finally, whichever method you select for your infrastructure, you will also need to change the corresponding setting in the Options category of WSUS Server and specifically in the Computers section.
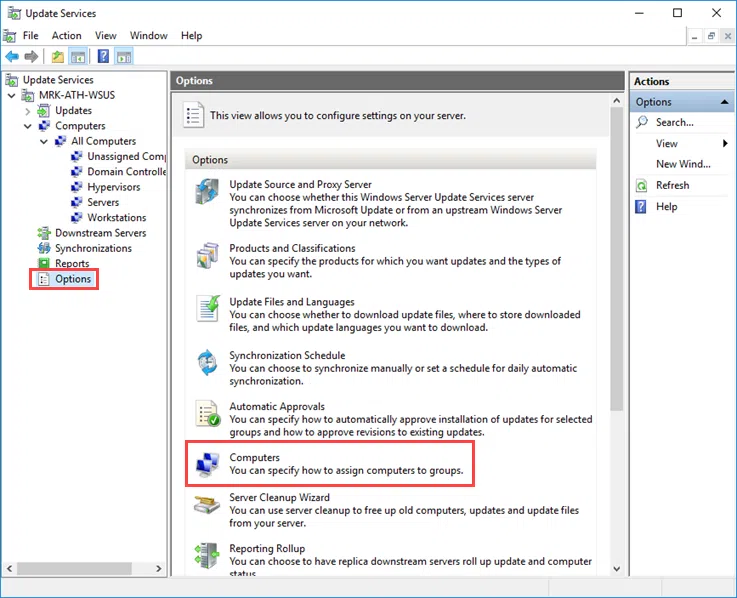
In the window that appears, select the client grouping method in Computer Groups and click OK.


