DHCP Reservations is a very useful feature of DHCP Server 2016. In essence, when there is a need for a DHCP client to “permanently” share the same IP address without having the chance to be assigned to another client, then we register it with a DHCP Reservation. Thus, when the client requests an IP address from the DHCP Server, then it will be given the same IP every time.
Setting up DHCP Reservations for DHCP clients (which may not be Windows clients only, but also printers or other member servers) can be done in two ways. Either by setting a reservation from a client who has already assigned an IP address or by setting beforehand which address will be assigned to the client when it is joined into the network.
The second case is especially useful when, for example, we want to import some printers on the network and instead of setting static addresses on the printer itself, get the IP address that we define based on the condition that will meet the corresponding DHCP reservation.
But let’s see how the whole process is done.
Configure DHCP Reservation for an existing DHCP Client
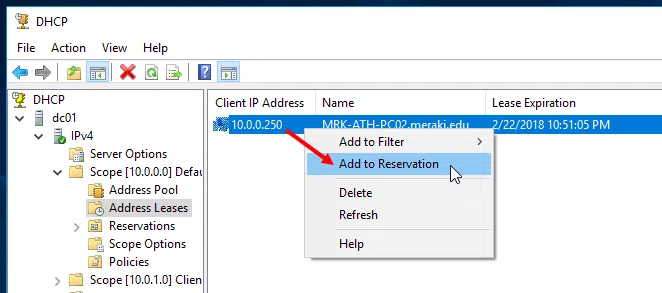
Suppose a DHCP Client has already received an IP address from the DHCP Server as shown in the Address Leases section of the figure below.
To add it to a DHCP Reservation, all you have to do is right-click and then Add to Reservation for each Scope.
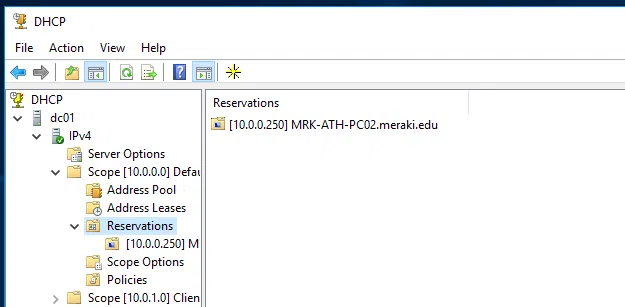
You can confirm the addition by opening the Reservations folder.
That’s it!
To delete a DHCP Reservation, just delete the record from the Reservations folder.
Configure DHCP Reservation for a new DHCP Client
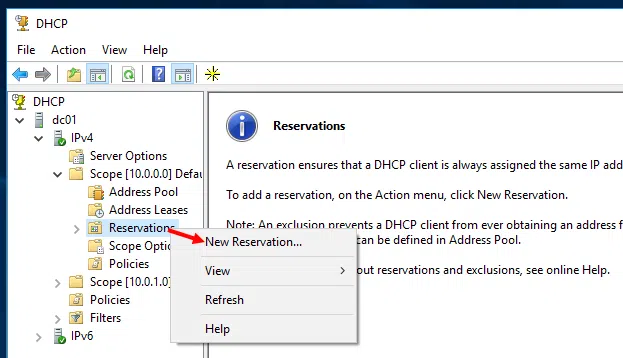
To set up a DHCP Reservation in the following way, you will need to know the MAC address of the client. Suppose we are going to add a printer to the network and want to get a specific IP address.
From the same console, right-click the Reservations folder and then click New Reservation.
In the window that appears, fill in the Reservation name, IP address and MAC address fields and click the Add button.
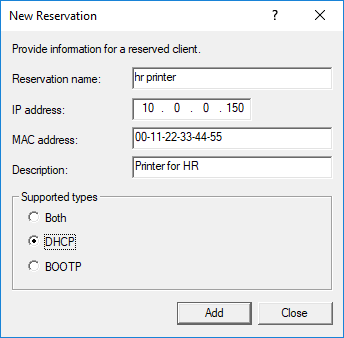
So, when the printer with that MAC address requests to receive IP from the DHCP Server, it will be mapped to the one you have configured.
Configure DHCP Reservations via PowerShell
Of course, all of the above can be done through PowerShell using the Add-DhcpServerv4Reservation cmdlet. Here are two typical examples that you can customize.
To convert an existing Lease into Reservation (as in the first case above)
Get-DhcpServerv4Lease -ComputerName "dhcpserver.contoso.com" -IPAddress 10.10.10.11 | Add-DhcpServerv4Reservation -ComputerName "dhcpserver.contoso.com" |
To add a new Reservation (as in the second case above)
Add-DhcpServerv4Reservation -ScopeId 10.10.10.0 -IPAddress 10.10.10.8 - ClientId "F0-DE-F1-7A-00-5E" -Description "Reservation for Printer" |


