Let’s assume the following scenario. We have a company’s headquarters and its branch. In the branch, we plan to install a new Domain Controller. The connection between the two points is “slow.” The Active Directory (ntds.dit) file consists of many GB.
If you follow the classic Domain Controller installation method in Active Directory, you can imagine how many hours or days will be needed until the full synchronization of the new DC is completed.
For this reason, Microsoft enables us to deploy a DC using the Install From Media (IFM) method. Thus, we can considerably reduce the time it takes to complete replication.
In fact, we create a file with Active Directory data, something like an export, from an existing DC and then import it into the new DC of the branch. Thus, only the changes between the export and its final import time to the new DC will need to be synchronized.
Before you proceed
Before you proceed with the Install From Media (IFM) method, you will need to know some basic things.
- The IFM method, obviously, can not be used for the first Domain Controller of a forest but for adding an extra DC
- The media file should be created by a DC from the same AD domain
- If the new DC will be a Global Catalog (GC) server, then the media file should be created by a DC which is also a GC server
- If the new DC will be a DNS server, the media file should be created by a DC with a DNS role installed
- If you deploy an RODC, you can create the media from either a writable DC or an existing RODC
- The IFM method creates a temporary database in the% TMP% folder, so make sure there is enough available space on the folder location
Using Windows Server 2016 and the NTDSUtil.exe tool, you can create two types of the media file, either the Full (writable) Domain Controller or the RODC. For Windows Server 2008 R2, there are two more options, Full DC with SYSVOL and RODC with SYSVOL. I just mention it if you need to know it.
Installing Active Directory using the Install From Media (IFM) method
As you may have already understood, the process is done in two basic steps, first in an existing Domain Controller from where we will create the media file and second in the new DC or RODC that will import the file we created when installing Active Directory.
In the existing Domain Controller
To create the file, we will use the NTDSUtil command-line tool. By typing help at each of the following commands, you can see the available options that you can use.
Open the command prompt with administrator privileges, type the ntdsutil command and press Enter.
Type enable ntds and press Enter.
Type IFM and press Enter.
To create media for a writable DC, type create full <-path>
To create media for an RODC, type create rodc <-path>
To create media with SYSVOL for a writable DC, type create sysvol full <-path>
To create media with SYSVOL for an RODC, type create sysvol rodc <-path>
Where <-path> type the folder’s location to create the file.
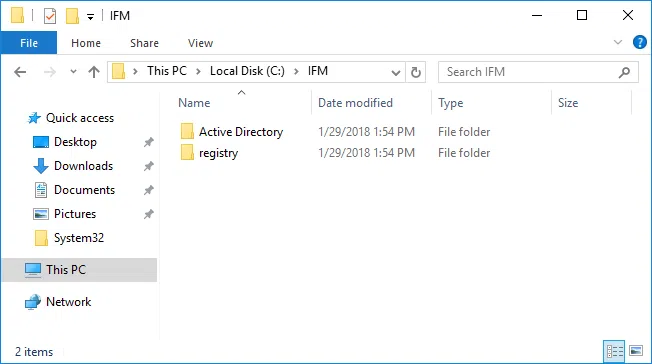
At this point, you will need to wait until the file creation is complete and see the message IFM media created successfully in C: \ IFM.
After this, press quit and then Enter to exit the NTDSUtil environment.

Open the IFM folder to confirm that the file is there.
Then transfer the folder to the branch anyway you want, even with a removable disk.
In the new Domain Controller
Make sure the removable disk containing the media is connected to the server, or you copied the file to a local or network folder.
First, install the Active Directory Domain Services role through Server Manager or PowerShell. I will not mention the same procedure here because there is already a detailed guide to that procedure.
Also, for the same reason, I will only refer to the point where you declare the folder and not specifically to the process of promoting the server to a Domain Controller. I remind you that you will need to enable Add a domain controller to an existing domain as the new DC should be in the same domain from where you created the file.

As you go through the Deployment Configuration wizard, in the Additional Options section, enable the Install from media option and select the folder where the media file you created. Click on Verify to confirm that the file is in good condition.
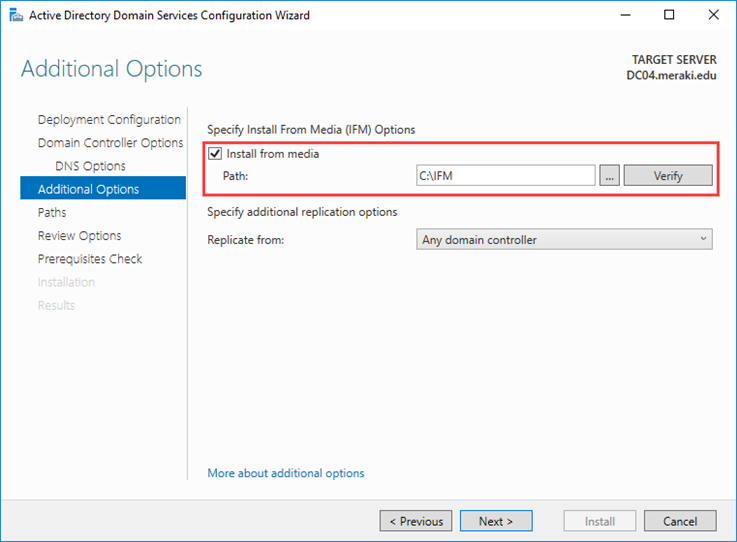
In the Review Options section, you will see that the folder you have previously specified is selected.

Then, complete the wizard; after the restart, your new domain controller will almost be ready. Almost because now will only need to replicate the objects that have changed since the file’s creation so far that they are much smaller in size.
In general, you should not leave a long time (eg> 30 days) from creating the file to deploying the new DC.


Nice explanation! 🙂
Plain and clear
Would you please explain for me about the different between IMF replicate server and upgrade a server? Could we replicate a 2003 in a new DC 2012 and then demote the old domain or they have to be the same version ?