One of the basic VMs of my Hyper-V Homelab is virtual routers. Many times I need to simulate the communication between different virtual regions, such as a headquarters with a branch office, connecting different networks to each other, setting up a Site-to-Site or Point-to-Site VPN, etc.
In this process, pfSense is a great help. PfSense is an Open Source Firewall / Router, free of charge and with few virtual hardware requirements, so it’s ideal for a Hyper-V Server.
In today’s article, we will look at how to create a new VM in Hyper-V and then proceed to a standard installation and network setup of pfSense. I will not go into the details of how to set up pfSense as a virtual router, this might be done in another article.
Creating the Virtual Machine in Hyper-V
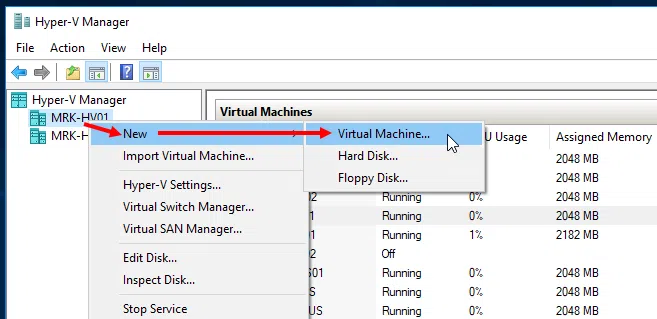
Once you have opened Hyper-V Manager and connected to the desired host, right-click the host and then click Virtual Machine on the New menu.
Immediately afterward, the wizard for creating the new Virtual Machine will begin. Click Next to continue.

In the Specify Name and Location section, type the name of the VM, and then select (if desired) the location where the VM files will be stored. Click Next to continue.
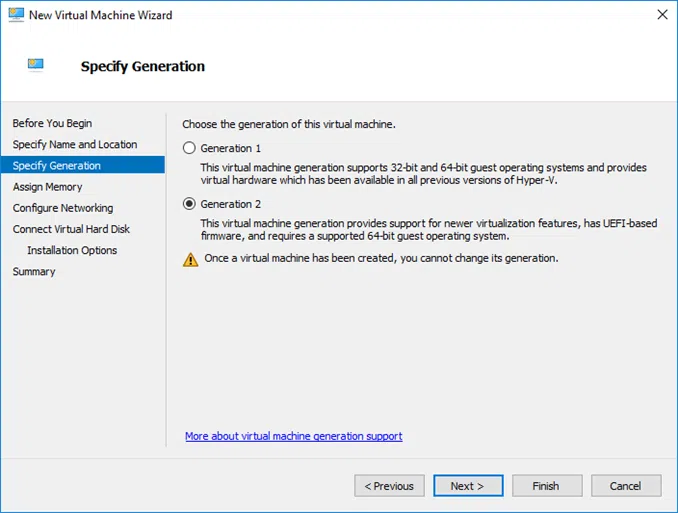
In the Specify Generation section, select Generation 1 if you are going to install an older version of pfSense. If you are installing a newer version such as 2.4.2 onwards, you can choose Generation 2. The safe choice here is the first. Click Next to continue.
In the Assign Memory section, leave the default value of 1024 MB. The minimum value is 512 MB, but 1 GB is recommended. Click Next to continue.

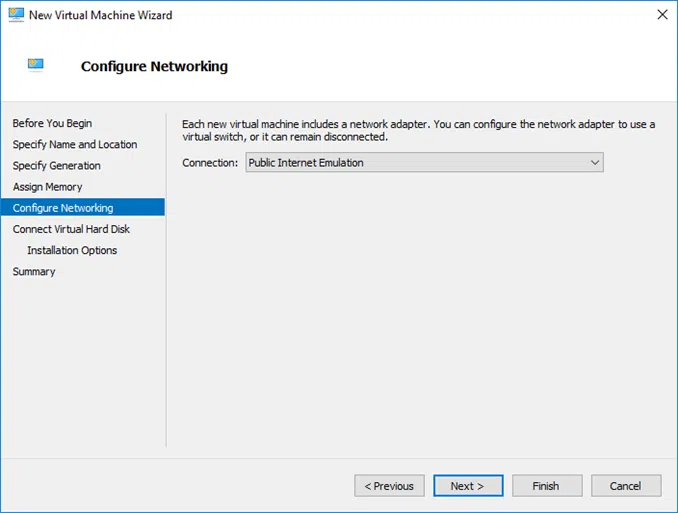
In the Configure Networking section, select currently the WAN connection from the popup menu and click Next to continue. We will add the other networks shortly.
In the Connect Virtual Hard Disk section, enable the Create a virtual hard disk option, change the name (if desired), and select the size of the disk. In a typical installation of pfSense, a disk with a capacity of between 10 and 20 GB will cover a large part of your needs. Click Next to continue.

In the Installation Options subsection, enable the Install an operating system option from a bootable image file, and then by clicking the Browse button, find the pfSense installation file .ISO. Click Next to continue.

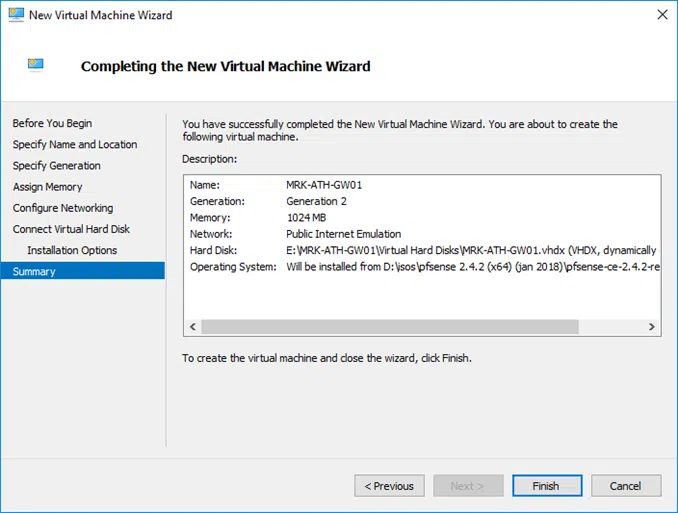
In the Summary section, you’ll see a summary of the settings you have selected. Click Finish to complete the virtual machine creation wizard.
Before you start the virtual machine to proceed with installing pfSense, you will need to customize your settings by right-clicking on VM and then Settings.
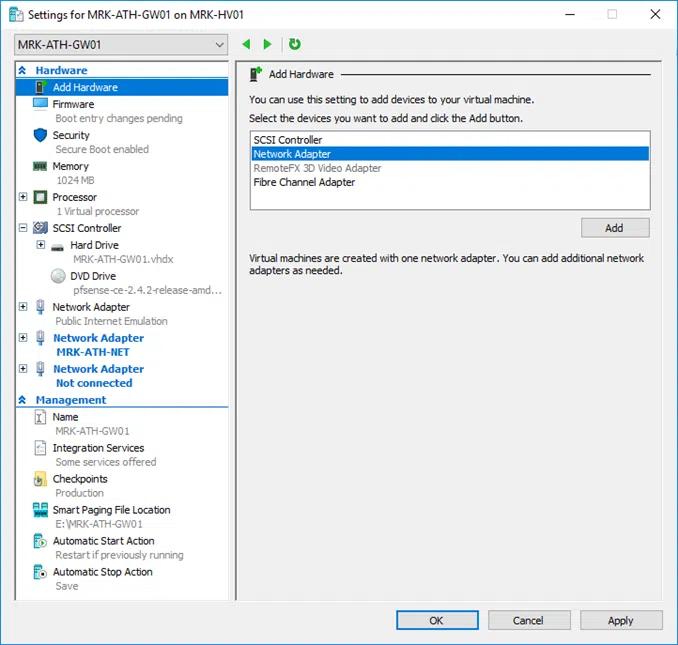
To add an additional network adapter, go to the Add Hardware section, select Network Adapter, and then click Add. Depending on the number of networks that will serve pfSense, add the corresponding additional adapters.
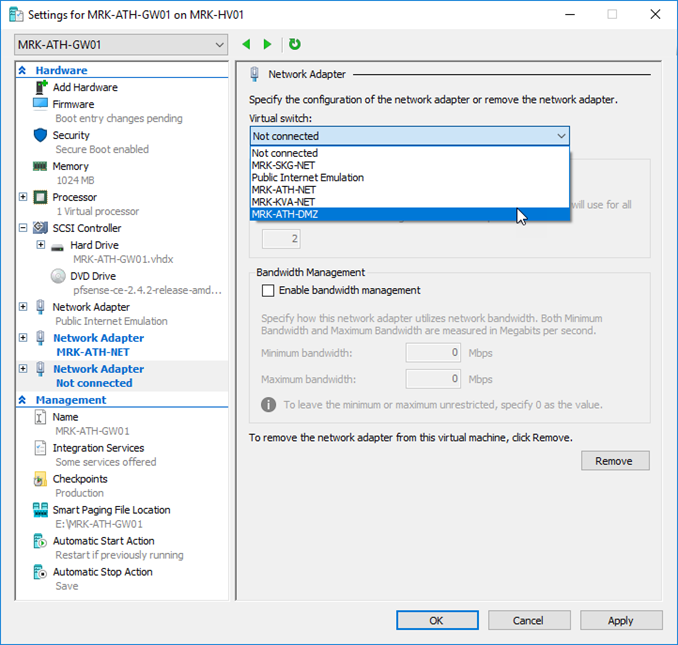
Next, set each network adapter separately by selecting the corresponding Virtual Switch to be connected.
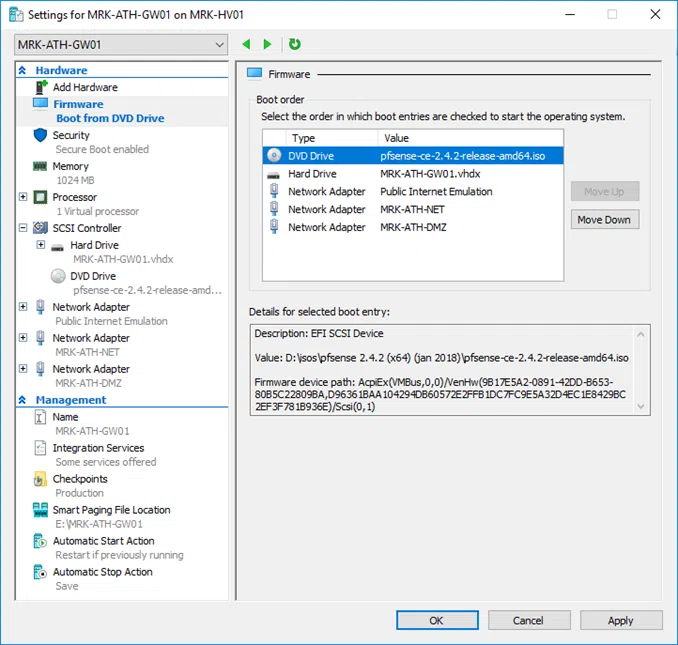
In the Firmware section, be sure to select the boot device as the virtual DVD drive to automatically start the pfSense installation process.
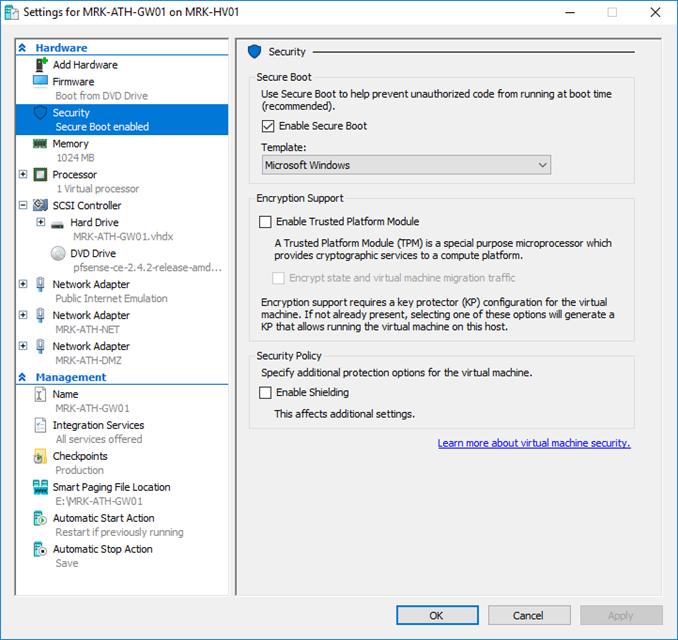
Finally, in the Security section, disable Enable Secure Boot by un-selecting it.
Installing pfSense
Start the virtual machine by clicking Start and then Connect.
On the first screen, you do not have to select an option, just wait until the files start loading.
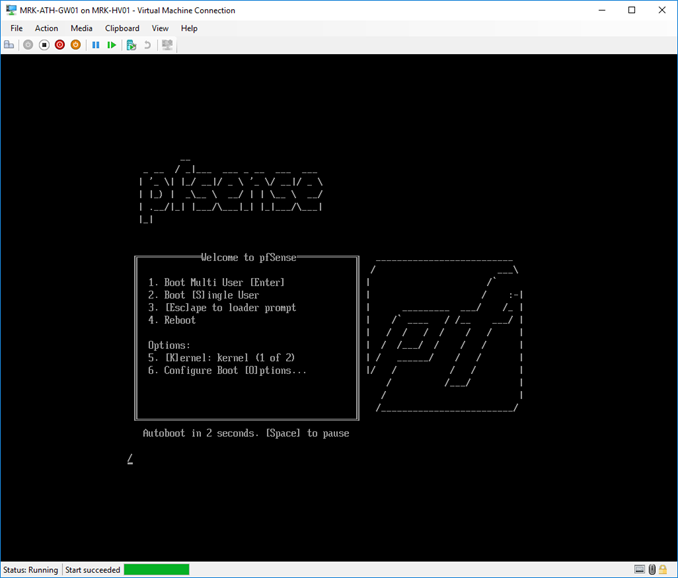
Accept the terms by pressing Enter.

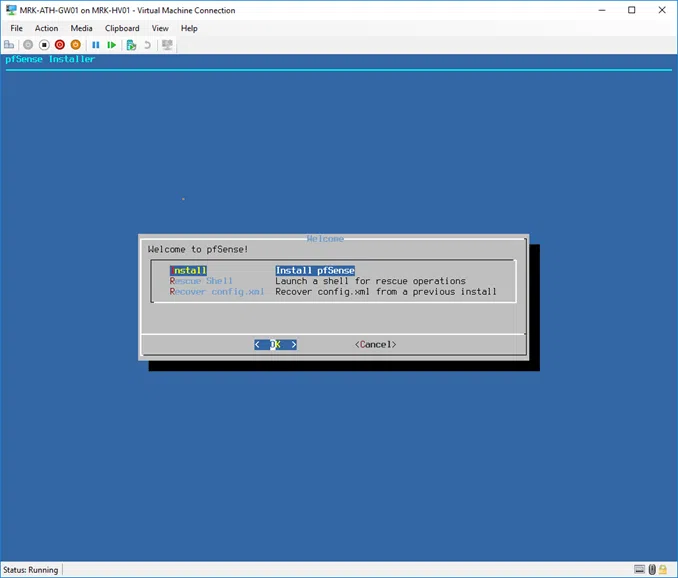
Select Install pfSense and click OK.
Select (if desired) a different keyboard layout and press Enter to continue.

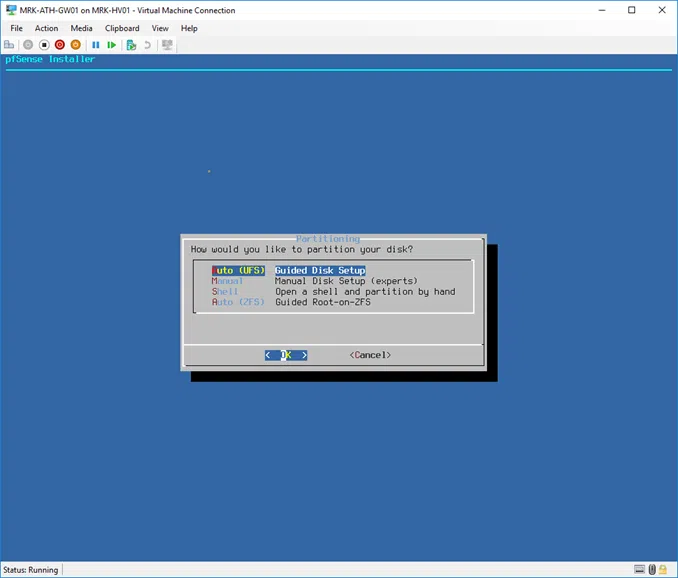
Choose the file type, the file system and click OK to continue.
Depending on your previous option, proceed with the installation of pfSense.
Finally, select Reboot and press Enter to restart pfSense.

Immediately after, shut down VM and its settings, remove .ISO from the DVD Drive by selecting None.
Now, start the VM again to get the basic pfSense settings.
Initial pfSense network settings
After the boot is complete, you will be prompted to make the first pfSense settings that are primarily for network adapters.
Before you go ahead, it’s a good idea to know the MAC addresses of each network adapter so that you know later how to configure the networks to connect. The MAC addresses can be easily seen through the Advanced Features sub-module of the corresponding network adapter.
In the question Should VLANs be set up now ?, press n to proceed.
Enter the WAN interface name or ‘a’ for auto-detection (hn0 hn1 hn2 or a): hn0
Enter the LAN interface name or ‘a’ for auto-detection (hn1 hn2 or nothing if finished): hn1
Enter the Optional 1 interface name or ‘a’ for auto-detection (hn2 or nothing if finished): hn2
Do you want to proceed? y
Wait a few minutes until the loading of pfSense is complete and find yourself in the main menu.
From this point, you can configure some of the basic pfSense network settings, specifically from 2 – Set interface (s) IP address. I will not go into further details at this point as for each one these settings are obviously different. Besides, it’s pretty easy to follow the setup steps.
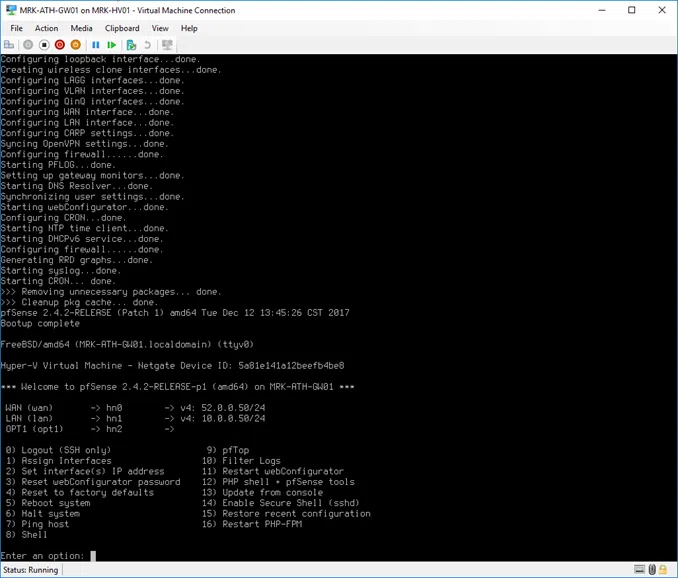
At this point, I should mention something basic. To enter the pfSense management environment through your browser, you will need to have your LAN adapter set up and then enter your IP address in the browser. In my case is 10.0.0.50.
The default credentials are the following:
Username: admin
Password: pfsense
The first time you log in, you can follow the pfSense initial configuration guide though it is not necessary. We will not go into the pfSense individual settings as this goes beyond the original idea of this article. I may be expanding myself further to a next article in the future.


Very good post but it’s initial setup which is available in every blog. Waiting for firewall rule,nat setup etc in more detail
Καλησπέρα. Έχω μια εργασία που μου ζητάει σε Hyper-V να φτιάξω ένα pfsense vm και ένα Win10 vm. Και να ρυθμίσω και τα δύο αντίστοιχα. Στο pfsense vm βάζω ένα external v switch (συνδεδεμένο με το φυσικό NIC του host) και ένα internal v switch (ή μήπως πρέπει private?). Στο Win10 vm βάζω το ίδιο internal (ή private) v switch. Τι IPv4 πρέπει να βάλω στο internal (ή private) v switch από τον host και τι WAN IP και LAN IP στο configuration του pfsense;; Please help!