One of the first steps you will need to take after installing and authorizing a DHCP Server 2016 is to create a new DHCP Scope. With Scopes, you actually indicate the range of IP addresses that the DHCP Server will serve and the corresponding DHCP clients will receive.
The process is pretty simple and fast. First, we’ll see how it’s done through the Windows Server 2016 graphical interface and the DHCP console, and then we’ll see how it works through PowerShell.
Let’s start.
Add a new IPv4 Scope on DHCP Server 2016
After you open the DHCP Management Console from Server Manager, expand the name of the DHCP Server, right-click IPv4, and then click New Scope.

The DHCP Scope creation wizard window will open immediately. Click Next to continue.

In the Scope Name section, enter the Scope name so you can identify it later as well as a description (optional). Click Next to continue.

In the IP Address Range section, specify the range of IP addresses that DHCP clients will receive from Scope, typing the start and end IP address range, and the Subnet Mask in one of the 2 fields, either in the Name or Length. Click Next to continue.

In the Add Exclusions and Delay section, specify the range of IP addresses that will be excluded from the scope range of the previous step. For example, if Scope ranges include IP addresses that correspond to other machines, you will need to add them as exceptions to avoid conflicts. Click Next to continue.

In the Lease Duration section, specify the length of time that an IP address will be assigned to each DHCP client. Depending on the requirements and nature of clients, you may need to choose lower or higher values. For example, in an environment where clients are mobile and have a short stay, you should choose shorter duration so that they are refreshed faster and better serve the overall load. Click Next to continue.

In the Configure DHCP Options section, you can configure the DHCP Server options, such as DNS, Gateway, etc., to be taken by DHCP clients. You can do this directly by selecting Yes, I want to configure these options now or at any other time by selecting No, I will configure these options later. In our case, we will do it now.

In the Router (Default Gateway) section, enter the IP address of the Gateway (do not forget to press the Add button) that DHCP clients will receive and click Next to continue.

In the Domain Name and DNS Servers section, type the domain name that clients will use for the DNS name resolution. Also, specify the DNS servers that will be used by typing either the hostname or the IP address in the corresponding fields. Click Next to continue.

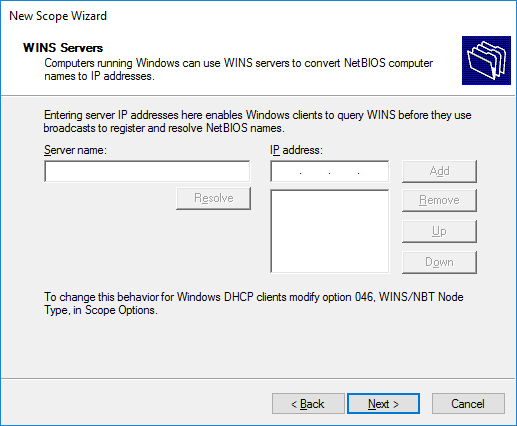
In the WINS Servers section, identify the corresponding servers as long as you use them on your infrastructure. Otherwise, simply click Next to skip this step.
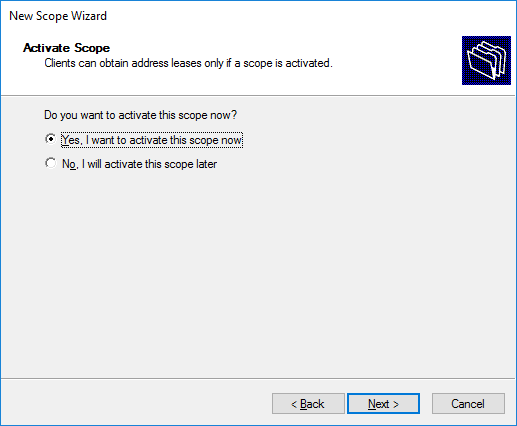
In the Activate Scope section, select whether or not to directly activate the DHCP Scope you just set up. If you enable this by pressing Yes, I want to activate this scope then your DHCP Server will immediately begin assigning IP addresses to clients. If you are not ready yet, select No, I will activate this scope later to turn it on at some other time. Click Next to continue.
Finally, click Finish to complete the setup process for your new DHCP Scope.
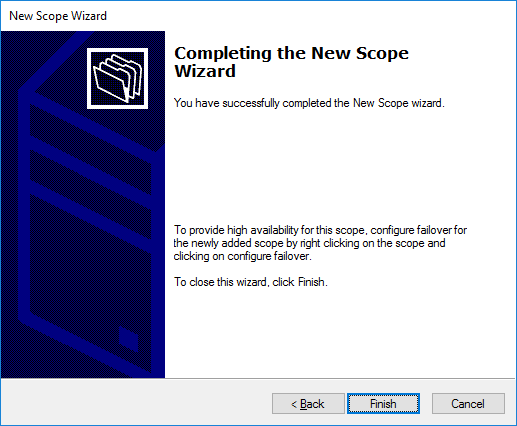
That’s it! Your new IPv4 DHCP Scope is ready.
Add a new IPv4 DHCP Scope using PowerShell
Open a new PowerShell window with administrator privileges. In our case, I have opened PowerShell on the DHCP Server and I am logged in using a Domain Administrator account.
Before proceeding to create the new DHCP Scope, we should know what the other Scopes of the server are. For this, we will use the following command.
Get-DhcpServerv4Scope |
To create a new Scope we will use the Add-DhcpServerv4Scope cmdlet with the appropriate parameters depending on the case. A typical example is shown below.
Add-DhcpServerv4Scope -name 'Lab Clients' -StartRange 192.168.3.100 -EndRange 192.168.3.200 -SubnetMask 255.255.255.0 -Description 'IP Addresses for Lab Clients' |

In the corresponding Microsoft article for the Add-DhcpServerv4Scope cmdlet, you can view all the parameters you can declare when you create Scope.
Using the next command, you can configure Scope Options for a specific scope, namely DNS server, DNS domain, and Gateway.
Set-DhcpServerv4OptionValue -ScopeId 192.168.3.0 -DnsServer 192.168.3.10 -DnsDomain meraki.edu -Router 192.168.3.254 |
To view the Scope Options you have already set up, use the following command.
Get-DhcpServerv4OptionValue -ScopeId 192.168.3.0 |
Finally, to add exceptions to an IP address range for a scope, use the following command.
Add-DhcpServerv4ExclusionRange -ScopeId 192.168.3.0 -StartRange 192.168.3.210 -EndRange 192.168.3.215 |
The above commands are just some examples of how to handle the settings of a DHCP Server through PowerShell. Of course, there are even more commands and parameters that you can use depending on your own infrastructure and needs. Maybe I’ll go further into this subject in a next article.


