To save a Windows 7 image that has been created by Microsoft’s Sysprep tool (and for later deployment), you will need the help of some additional tools that are offered by the company, such as the Microsoft Deployment Toolkit (MDT). However, there are alternative methods of capturing the Sysprep image using a WinPE disk.
The WinPE disk (Windows Preinstallation Enviroment) is essentially a limited version of Windows that runs entirely in RAM after it is loaded from a CD or USB flash drive, and is managed through the command line.
Microsoft unfortunately does not offer a ready-made WinPE disk so we’ll need to create it from scratch using the Windows Automated Installation Kit (WAIK) for Windows 7. In this example we will focus only on the process of creating a WinPE disk, embedding the imagex.exe tool that will help us in creating and subsequently implementing the Sysprep image needed to deploy Windows 7 in your organization.
Firstly, you will need to install the Windows Automated Installation Kit (WAIK) on your Windows 7 computer. You can download it from here.

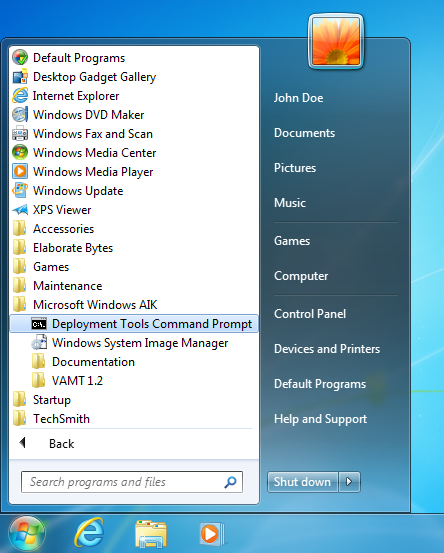
Then find the Microsoft Windows AIK folder in the Start Menu and open the Deployment Tools Command Prompt.
Type the following command to copy the contents of the WinPE folder to a new folder, which will be created automatically with the name winpe.
For the 32-bit version of Windows:
copype.cmd x86 c:\winpe
For the 64-bit version of Windows:
copype.cmd amd64 c:\winpe

Depending on the version of the WinPE disc you want to create, the copy command is slightly different. Thus, for 32-bit use the parameter x86 and 64-bit parameter amd64. Do not be concerned about the name amd64, as it works for 64-bit Intel processors as well as AMD.

Note too that in the last part of the c:\winpe command you can add an alternative location and filename to be created. For example, if you create version of the WinPE disk for each processor architecture you can provide the names winpex86 and winpex64 (or others of your choosing) allowing you to easily distinguish the two different versions. If you do name your folders differently, obviously you should adjust the commands we’ll walk through as needed.
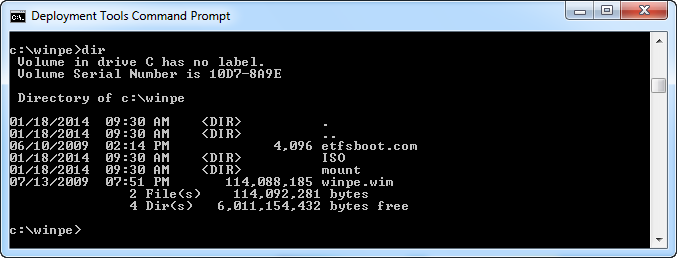
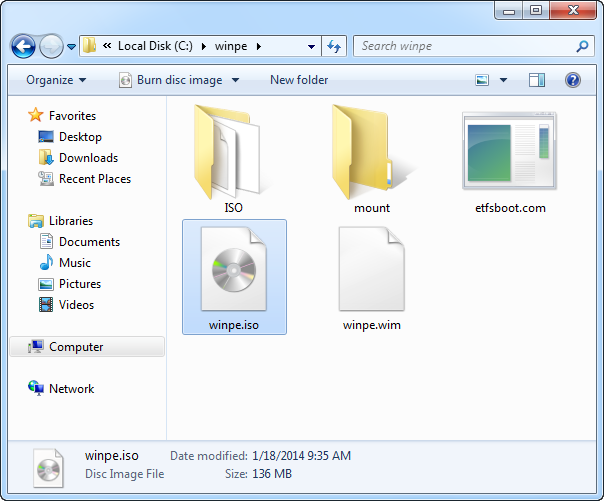
Now, type the command dir with the folder you created to check its contents.
c:\winpe> dir
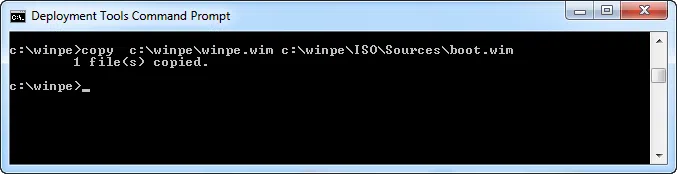
Copy the winpe.wim file located in the folder to the ISO folder and then rename it to boot.wim, typing the following command:
c:\winpe> copy c:\winpe\winpe.wim c:\winpe\ISO\Sources\boot.wim
Immediately after, copy the imagex.exe tool from the WAIK installation folder (located in the Program Files folder) to the WinPE ISO folder with the following command.
c:\winpe> copy “c:\Program Files\Windows AIK\Tools\x86\imagex.exe” c:\winpe\ISO
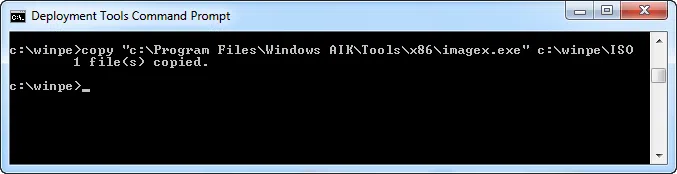
Because of the spaces that exist in the folder path above, use the symbols “” in order for the command to be recognized correctly.
Finally, let’s create the .iso file for our WinPE disk in the WinPE folder.
c:\winpe> oscdimg.exe -n -bc:\winpe\etfsboot.com c:\winpe\ISO c:\winpe\winpe.iso
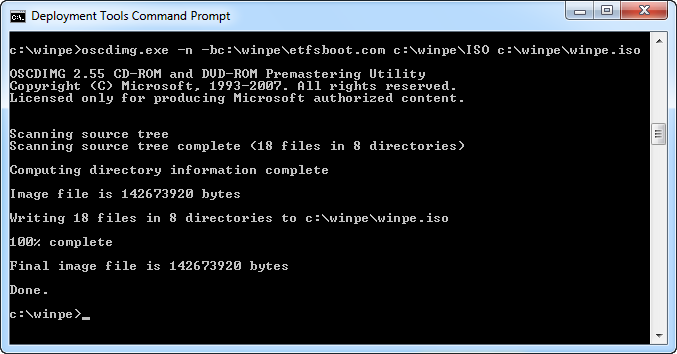
That’s it! Now you can write the winpe.iso file you just created to a CD / DVD or create a USB boot disk to run the bootable WinPE disk from a USB flash drive.


I’m a little late in commenting, but I wanted to say that this was the exact article I have been searching for for quite some time. So thank you Dimitris for putting it together, especially with all of the screen shots. A fantastic resource!
Excellent
bad last command. bad sign – before n and bad space winpe. iso
The right command (just copy paste) is :
oscdimg -n -bc:\winpe\etfsboot.com c:\winpe\ISO c:\winpe\winpe.iso
https://docs.microsoft.com/en-us/previous-versions/windows/it-pro/windows-vista/cc749311(v=ws.10)
Post updated with the corrected command, sorry for the typo.