The Read-Only Domain Controller, or RODC for short, as one can understand by its name, has a read-only copy of Active Directory. It is mainly used in branch offices where the physical security of the server cannot be guaranteed, there is no fast and sufficient (WAN) connection with a central point or no specialized IT staff. I will not extend to why to include an RODC in your environment, but how to do this.
Install a Read-Only Domain Controller (RODC)
The installation of an RODC can be done in two ways. The classic case is to install the Active Directory Domain Services role and then to promote the RODC, a process that is similar to a new addition of a Domain Controller into the Active Directory infrastructure. The other way is to pre-create an RODC account (Staged) with pre-defined settings and then deploy it into the infrastructure. In the current article, we will see the first case.
Install the Active Directory Domain Services role
Open Server Manager, click Manage and then Add Roles and Features.

Immediately afterward, the wizard window will open. In the Before You Begin section, click Next to continue.

In the Installation Type section, select Role-based or feature-based installation and click Next to continue.

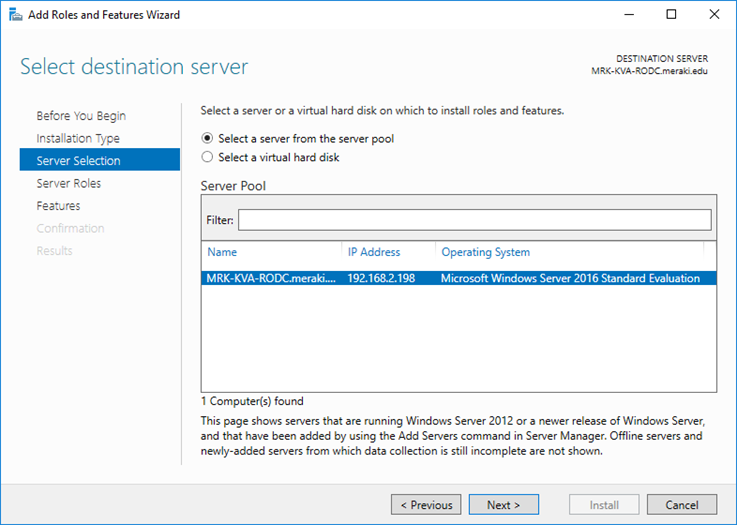
In the Server Selection section, make sure the server you want is selected and click Next to continue.
Under Server Roles, select Active Directory Domain Services. Once you do this, you will be asked to add some additional features. Click the Add Features button and then click Next to continue.

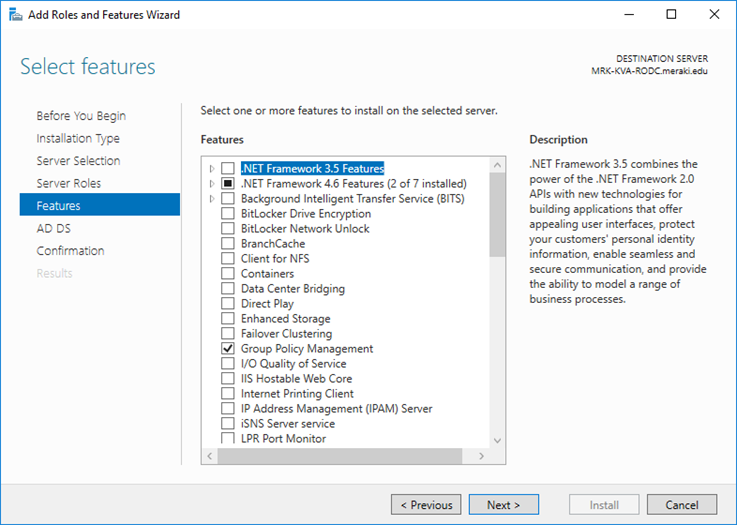
In the Features section, you do not have to choose something, just click Next to continue.
In the AD DS section, some information about AD DS is displayed, just click Next to continue.

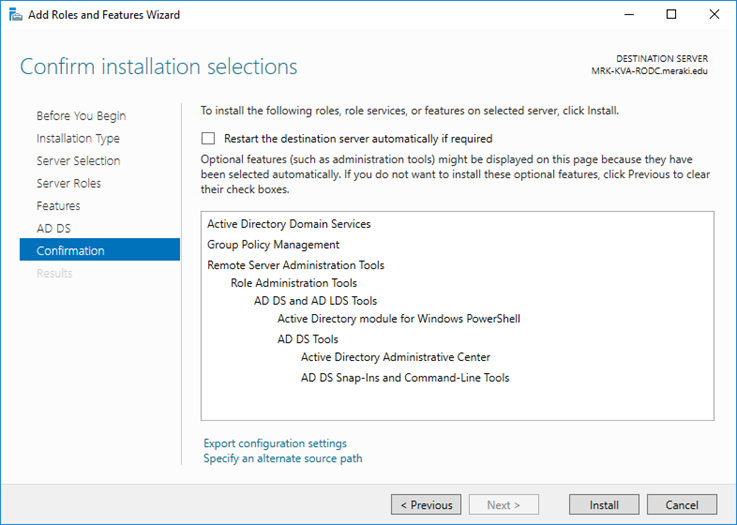
Finally, in the Confirmation section, click the Install button to proceed to install the role.
Promote the server to a Domain Controller
Once the role is completed, if you do not close the window, you will be prompted to promote the server to a Domain Controller (DC).
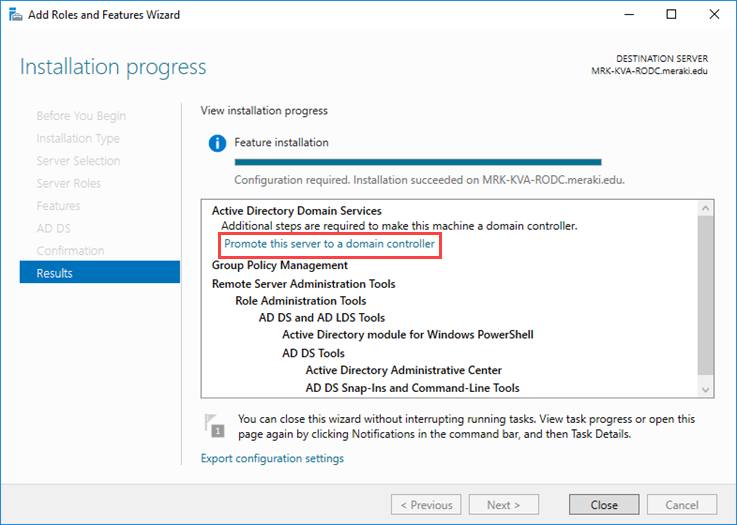
Alternatively, you can open the same window through Server Manager, as shown in the figure below.

In essence, this is the Active Directory Deployment Configuration wizard that will guide you to add another Domain Controller to the Active Directory environment.
In the Deployment Configuration section, since the forest already exists, enable Add a domain controller to an existing domain, and then type the domain name in the corresponding field. In our case is meraki.edu. You will also need to provide the credentials of an account that has the ability to add DC to the existing domain, such as the Domain Administrator. To proceed, click Next.

Under Domain Controller Options, enable (if desired) the Domain Name System (DNS) Server and Global Catalog options, leave the default Site Name and type the Directory Services Restore Mode (DSRM) password. Be sure to keep this in your documentation. The most important part here is to enable the Read-only Domain Controller (RODC) option. Click Next to continue.

In the RODC Options section, select a user or group account with the delegated administrator privileges. Also, at this point, you can set up Password Replication Policy, which accounts will be allowed to replicate passwords to the RODC and which will not. However, this is something you can change at any time in the future. Click Next to continue.

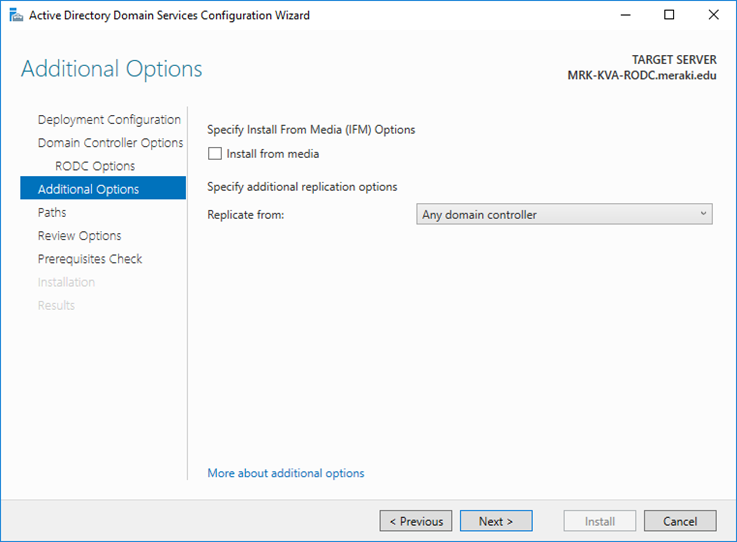
In the Additional Options section, you can select from which Domain Controller to replicate to the current DC. If you do not have a specific reason, leave the default Any domain controller and click Next to continue.
In the Paths section, choose where the NTDS, SYSVOL, and LOG folders will reside on your server. In our case I will leave the default ones, you can choose another disk based on your preferences and setup.

In the Review Options section, you will see a summary of the settings you have selected. Once you’re sure you have not made a mistake, click Next to continue.

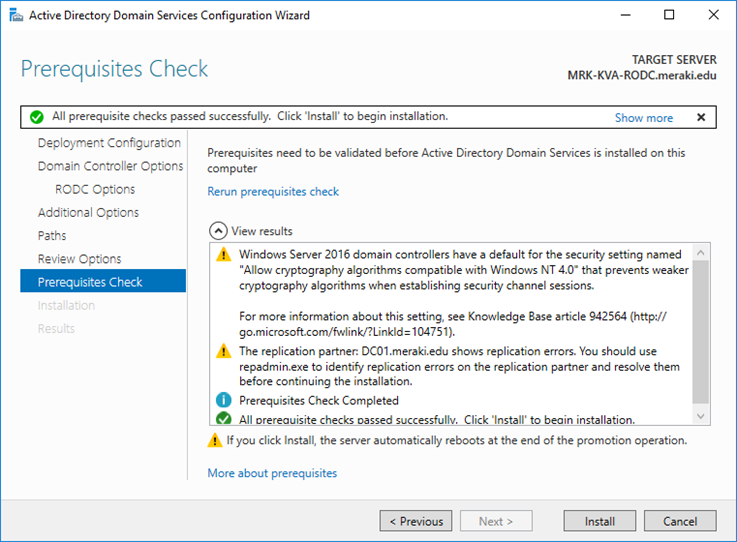
In the Prerequisites Check section, the prerequisites will be checked. Here, if even one error occurs, then you will not be able to continue and you will need to fix it before proceeding. Otherwise, if only warning messages are displayed but the check has ‘passed’ as shown in the picture, click the Install button to proceed.
At this point, you will need to wait a few minutes until the installation process is completed. The server will automatically reboot immediately and after that, the RODC will be ready.


