In today’s article, we will see how we can join a Windows 10 computer in an Active Directory domain, using both the graphical user interface and PowerShell.
Of course, before you start troubleshooting why you can not complete such an easy process, it would be good for you to know what are the basic prerequisites for joining a computer in the domain. Hint: Check the computer’s DNS settings.
Also, before proceeding, it is a good idea to first change your computer’s name so you can recognize it more easily in your environment.
Windows 10 AD domain join using the GUI
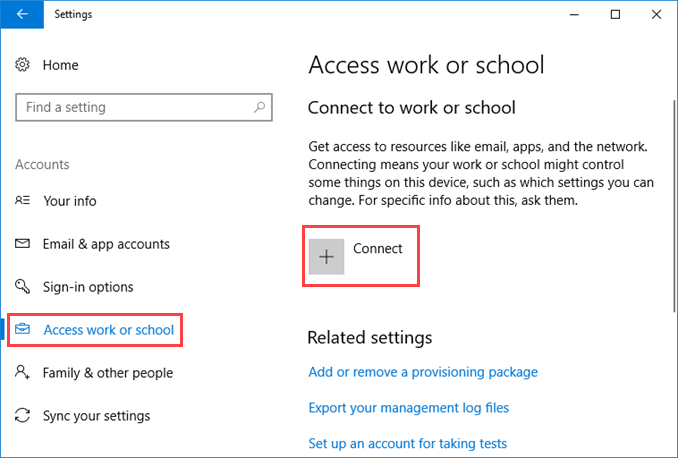
Open the Windows 10 settings, go to the Accounts section, and then go to the Access work or school section. Here, tap on Connect.
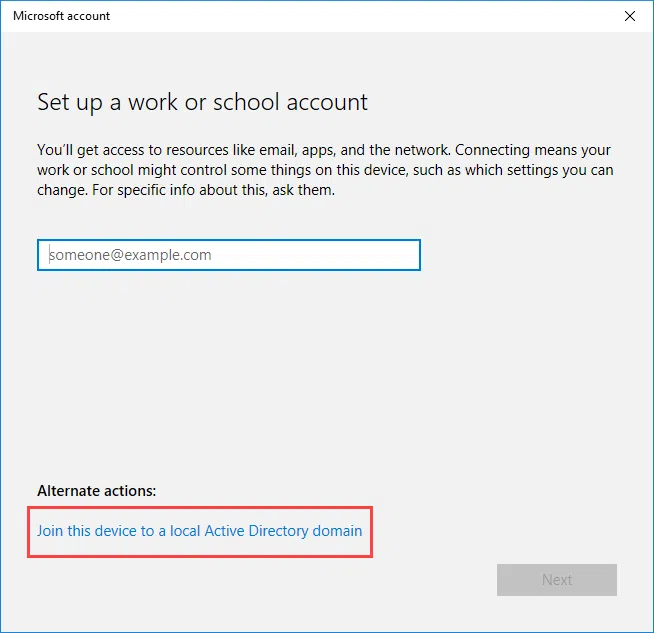
In the window that appears, click on Join this device to a local Active Directory domain option.
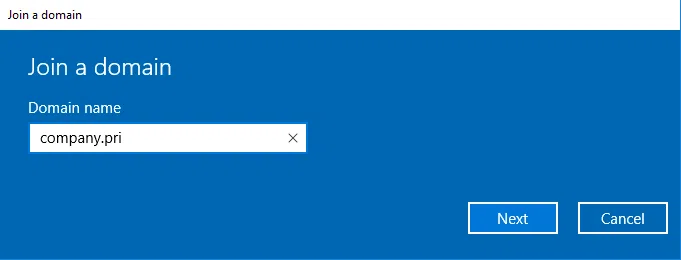
Next, type the Active Directory domain name and click Next.
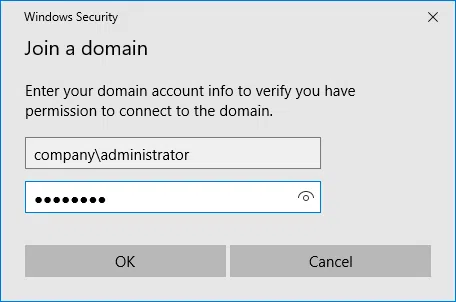
Type the credentials of a domain user.
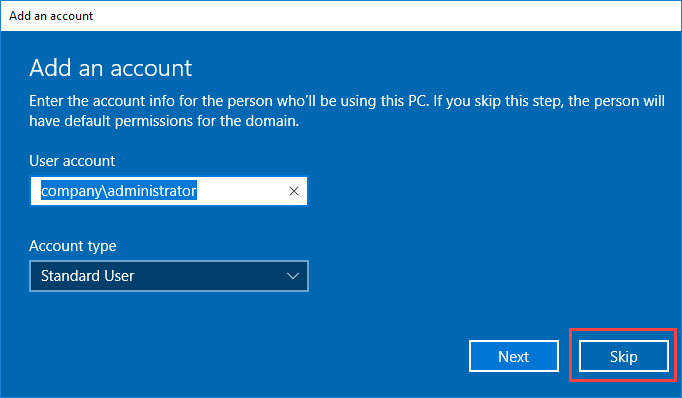
Click on the Skip button to skip the addition of a new user.
Finally, you will be prompted to restart the computer to complete the joining process to the local Active Directory domain.
Alternatively, there is the classic method of joining a computer to the domain through System Properties, but we will not expand further in this case.
Windows 10 AD domain join using PowerShell
Open a PowerShell window with administrator rights and type the following command by changing DomainName to yours and DomainUser with a domain user account.
Add-Computer -DomainName DomainName -Credential DomainUser |
For example, the command would look something like this:
Add-Computer -DomainName meraki.edu -Credential Meraki\Administrator |
After the command runs, you will need to type the user’s password and then restart your computer to complete the process. Since you have the PowerShell window open, use the Restart-Computer cmdlet to do so immediately.
