In a previous article, we saw how to create a fully updated VM template that we will use as the basis for creating the next VM in our virtual lab. We will use the “clone” feature provided by the VMware Workstation which, as you will see below, is a simple and quick process.
Create a VM clone from template VM
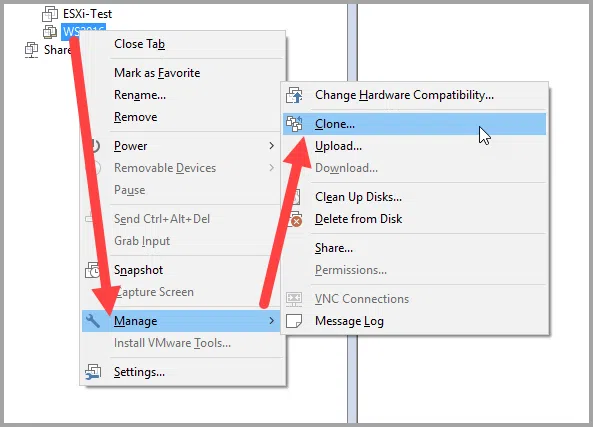
Right-click the VM template and click on Clone from the Manage menu.
In the clone creation wizard, click Next to continue.

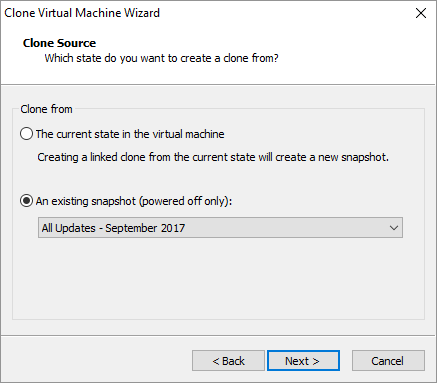
Then, select the An existing snapshot option and select the VM snapshot you created earlier. Click Next to continue.
You will then need to choose whether to create a linked clone or a full clone. Their description is quite explanatory. In short, if you have disk space available and you want to create a standalone VM then choose to Create a full clone. Otherwise, you can save disk space by creating a linked clone with the template. In our case, we will use the Create a linked clone option.

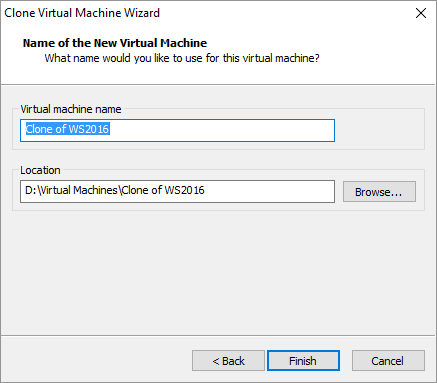
Select the VM name and the VM file storage location.
Clicking the Finish button begins the clone creation process. If you have selected a linked clone, the VM will be ready in a few seconds, and if you select full clone it will take a few minutes before all the required files are created.

That’s it! The new VM clone from the template VM is ready and you can instantly launch it to integrate it into your virtual lab.


Dear Dimitris,
Article 1&2 on VM Creation were very helpful. Good Job Brother.
Best Regards,
Dame Luthas