Creating a new Windows VM is a time-consuming process as you need to create the VM, install the operating system, and then install all available updates. In a small lab consisting of 1-2 servers this may be unnecessary, however, as the lab expands with more servers then we need to save time when adding new VMs.
In today’s article, you’ll see how to create a Windows VM template on VMware Workstation which will be the basis for all the other VMs you will create from now on. Using this VM template, you will be able to create ‘clean’ clones of the template to speed up the process of adding new VMs to the virtual lab.
Since my virtual lab consists of Windows VMs, the VM template will be based on Windows Server 2016.
Creating the template VM
First, you’ll need to create the VM to use as a template by following the steps we have described in a previous article.
When I create a template VM, I usually configure its hardware to have a direct internet connection (to download updates) via NAT and give it a bit more RAM (eg 4 GB) to be able to run faster. After the template is finished, I give it the final hardware I want it to have.
Install the OS
Next, start the operating system installation process using the installation ISO, in my case, we will see Windows Server 2016.
Once the installation is complete, stop when you reach the OOBE (Out-of-Box Experience) phase. At this point, we will enter Audit Mode by skipping the creation of an Administrator account and set individual OOBE settings. This is done to create a completely generic template that will give us flexibility later while creating the new VMs based on that template.
To enter Audit Mode, press Ctrl + Shift + F3 when you reach the first OOBE screen as shown in the picture below.
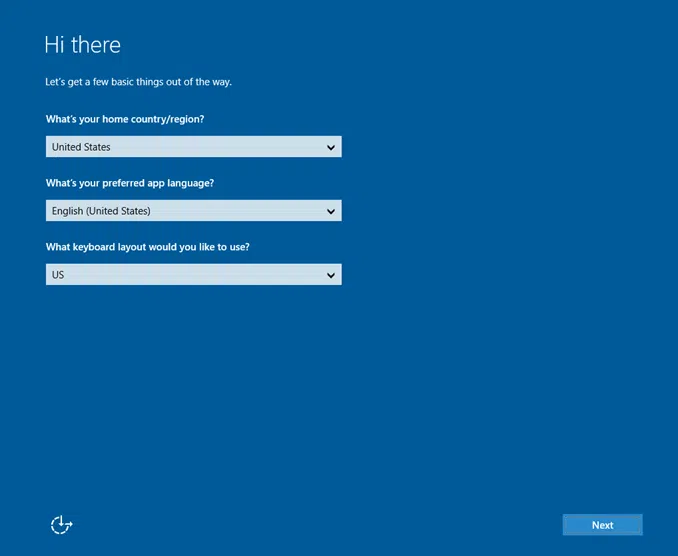
Immediately afterward, you will be logged in to a temporary administrator account by skipping OOBE. Even if you restart the VM, you will remain in Audit mode until you reach the Sysprep phase that we will see below.
Install updates and configure settings
At this point, since VM can communicate with the internet, you can start installing all available updates via Windows Update. Keeping a fully updated VM template means that you will not need to install the same updates again when you create the clones from that template.
Also, at this point, you can configure some basic settings that will also exist on the clones. It would be advisable to keep the template VM as clean as possible without installing roles etc.
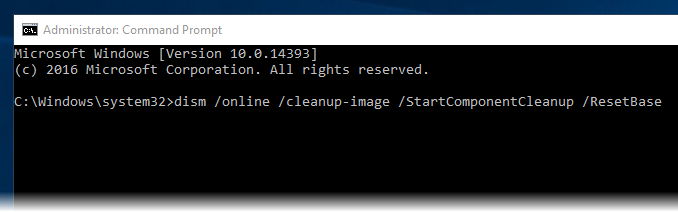
After you have finished installing updates, open the command prompt with administrative privileges and type the following command to clear the operating system from older updates that are no longer needed.
dism /online /cleanup-image /StartComponentCleanup /ResetBase
Once all the procedures for preparing the VM template have been completed, we will use Sysprep to prepare the system for the role of the generic template.
Open File Explorer and go to C: \ Windows \ System32 \ Sysprep. Here, open the Sysprep.exe executable file.
In the Sysprep window, select Enter System Out-of-Box Experience (OOBE), select Generalize and then select Shutdown in the drop-down box of Shutdown Options.

Pressing the OK button will begin the system preparation and finally, the VM will close.
Take snapshot of template VM
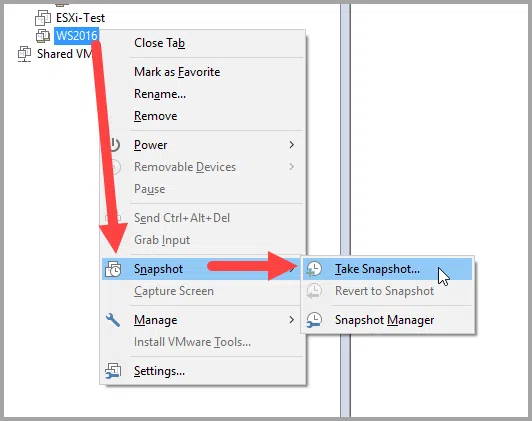
Next, we will create a new snapshot of the template VM so that we can use it later to create the next VMs based on that snapshot.
Right-click the VM template and then click Take Snapshot in the Snapshot menu.
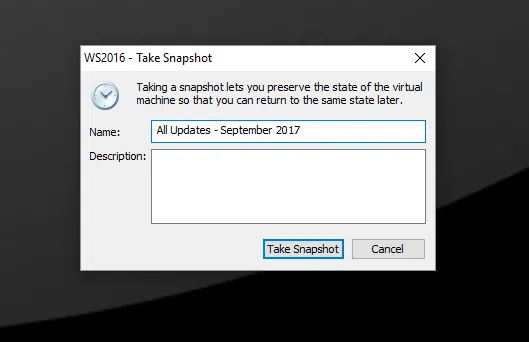
In the window that opens, type a name and description for that snapshot and click the Take Snapshot button to complete the process. You might want to give a name that will represent this snapshot to make it more recognizable to you after a while.
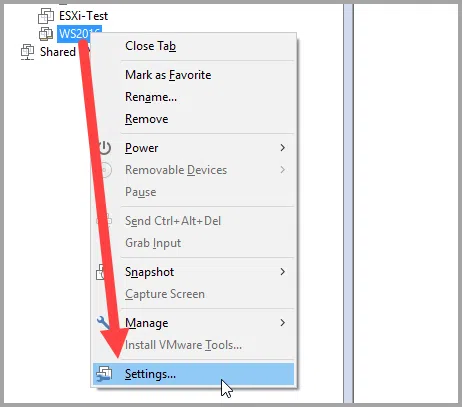
Then right-click the VM template again and click Settings to open the VM settings window.
Here, go to the Options tab and then the Advanced section. Enable the Enable Template mode (to be used for cloning) and click OK to save the changes.
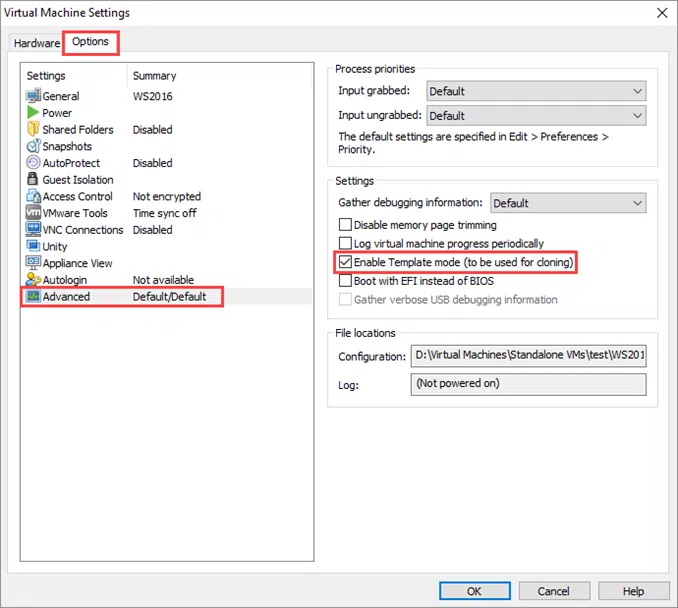
That’s it! Now, we’ve created a clean VM template that we can use as the basis for all the other VMs we’ll add to the virtual lab.
In the next article, we will just look at this process, ie how to create a new VM using the template VM that we have set up.


so the alt+shift+f3 was not working for me.
Microsoft says its ctrl+shift+f3, this does work.
Thanks for the write up though, very useful!
You are right, I mistyped it but now it’s corrected.
I never reach this part
Next, start the operating system installation process using the installation ISO, in my case, we will see Windows Server 2016.
Once the installation is complete, stop when you reach the OOBE (Out-of-Box Experience) phase.
it simply continue’s so this article is on no use to me