Before you start creating a VM, you will need to have the installation ISO of the operating system such as Windows 10 or Windows Server 2016.
Create a new Windows based Virtual Machine (VM)
In this article, we will use an ISO installation of Windows Server 2016. However, the process is similar for any Windows based installation.
First, click on the File menu and select New Virtual Machine to launch the VM creation wizard.

In the window that opens, you will need to choose between Typical and Custom settings for the VM you will create. In our case, we will select Custom which gives us somewhat more flexibility in the following VM settings. To learn the difference between Typical and Custom Customizations see here.
Then choose hardware compatibility with VMware Workstation versions. If you are not going to use VMs that require a specific version of the Workstation then leave the 12.x version selected and click Next to continue.
At this point, you can select from which media the installation of the operating system will proceed. If you select the Installer disc image file (iso), VMware Workstation will recognize the version of the operating system and will prompt you to proceed using the Easy Install procedure. More about Easy Install here.
In our case, I will choose I will install the operating system later, allowing us to create a blank disk and later select which operating system we will install. Click Next to continue.
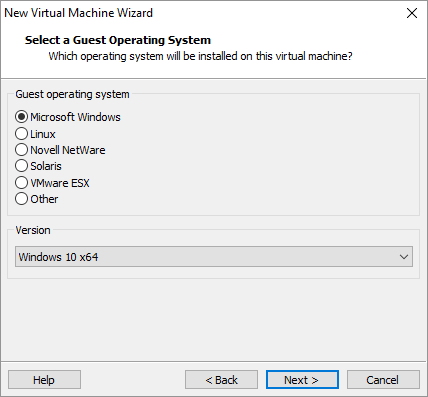
In the next step, since we have not selected an ISO installation, we will be asked to choose which operating system to install. In this case, select Microsoft Windows and Windows Server 2016. Click Next to continue.
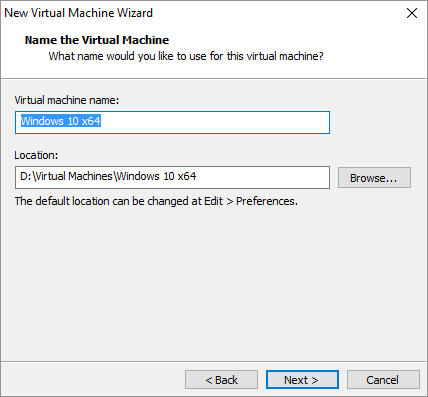
Next, type a name for the VM to create as well as the storage location of the VM files. It is a good idea to create a dedicated folder on your computer for all VMs and create a new separate folder for each VM separately. However, this is at your own discretion and depending on your own configuration of your virtual lab.
Choose between BIOS or EFI, depending on the type and testing you want to do on your VM.
Select the number of processors and cores that the VM will have.
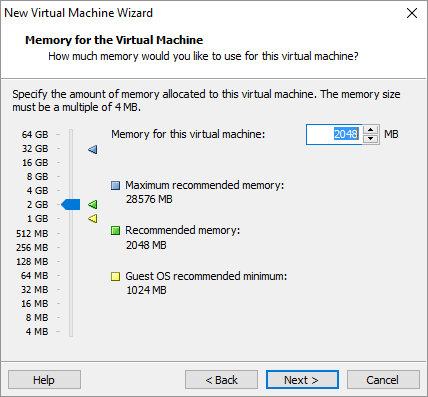
Select the available RAM that the VM will have by typing a number in the corresponding field or moving the pointer.
Select the type of network that will use this VM between Bridged, NAT, Host-Only Networking. The most basic setting is NAT that automatically gives access to the Internet after the first boot of the operating system.
Select the I / O type for the SCSI controller. Depending on the operating system you are about to install, some options may not be supported.
Choose the type of virtual disk, the preferred option is SCSI.
Choose whether to create a new virtual disk or use an existing one (virtual or physical). Since it’s the first VM you create, choose Create a new virtual disk.
Select the size of the virtual disk (in GB), and then create it as a single store file (Store virtual disk as a single file) or a multi-file store. Also, enabling Allocate all disk space now means that the virtual disk that will be created will immediately occupy the entire space you chose, so turn it on only if you already have enough free disk space. Otherwise, the virtual disk will gradually expand as new data is added.
Select the name of the virtual disk (and its complementary tracks). As a storage location, you can leave the default one in the same folder as the other VM files.
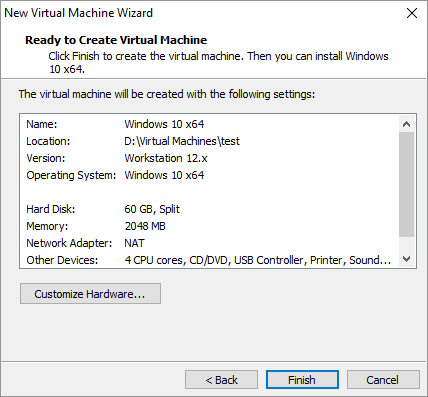
Finally, clicking the Finish button will complete the VMware Workstation VM creation process. At this point, you can see a summary of the settings you chose in the previous steps. Also, by clicking on the Customize Hardware button, you can customize the hardware part of the VM, for example by modifying the RAM, adding more disks, network adapters, etc. However, all these can be done later.
Did we forget something? Yes, the operating system.
In the previous step, we chose to declare the installation ISO after creating the VM, so it’s time to do it now.
Right-click VM (or from the VM menu) and then Settings to open the VM settings window.
Go to the CD / DVD (SATA) section of the Hardware tab. Here, make sure that Connect at power on is enabled. Then select the Use ISO image file option and then select the installation ISO by clicking the Browse button.
That’s it! Now, you are ready to start the new VM for the first time by tapping Power on this virtual machine or the corresponding icon and then proceeding to install the operating system you chose.


