When we use a monitoring tool in an enterprise environment, monitoring data of Windows and Windows Server machines is usually done through WMI (Windows Management Instrumentation). However, there may be cases that you may need to use the Simple Network Management Protocol (SNMP).
SNMP is already installed in versions prior to Windows 8 and Windows Server 2012. However, in Windows 8, Windows 10, Windows Server 2012, and Windows Server 2016 will need to install it. Note: SNMP Service is deprecated since the Windows Server 2012 R2 version.
Of course, if you are going to install SNMP on multiple endpoints (computers, servers, VMs, etc.), then it would be preferable to do so remotely using PowerShell and/or Group Policy.
Check if SNMP is installed
Before we get started, it’s a good idea to first check if the SNMP service is already installed and running on Windows 10 or Windows Server 2016. This can be done very easily through PowerShell by typing the following command.
Get-Service -Name snmp* |
If the corresponding service does not appear, then it is not installed. Similarly, on Windows Server, you can type the following command.
Get-WindowsFeature SNMP-Service |
Alternatively, you can open the Services or Task Manager window and search for the SNMP Service. If it does not exist then it is not installed.
Install SNMP in Windows 10 and Windows Server 2016
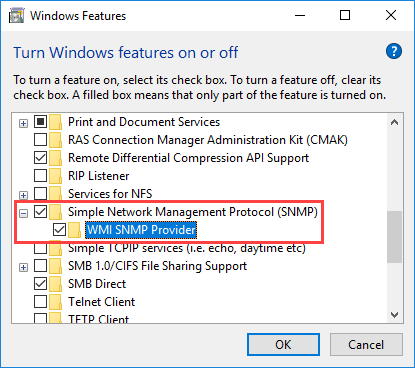
In Windows 10, installing SNMP Service is done through the Add Windows Features window. As shown in the figure below, check Simple Network Management Protocol (SNMP) and press OK.
In Windows Server 2016, SNMP is installed through Server Manager. Start the Add Roles and Features wizard, click on Next until you reach the Features section where you will need to check the SNMP Service option. Continue on completing the wizard by pressing Next and Finish.
Installing SNMP is easier with a PowerShell one-liner on Windows Server 2016.
Install-WindowsFeature SNMP-Service -IncludeManagementTools |
Configure SNMP on Windows 10 and Windows Server 2016
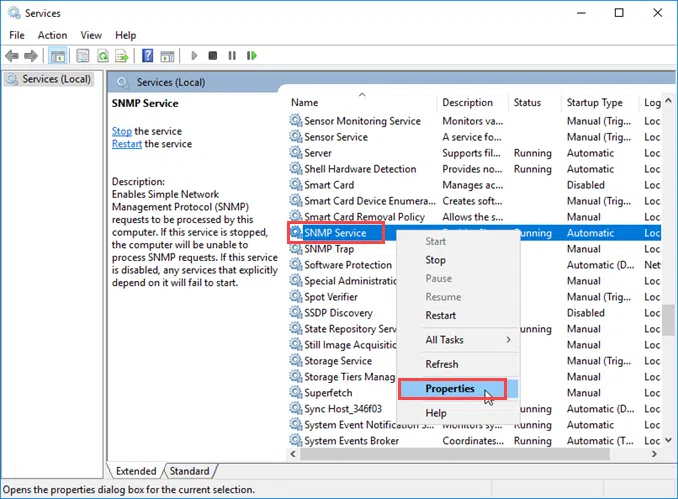
In both Windows 10 and Windows Server 2016, the SNMP setting is configured through the service properties window. So, open the services.msc window, find the SNMP Service, and open Properties.
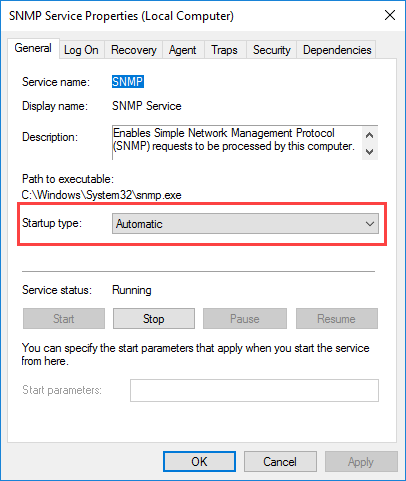
Here, on the General tab, be sure to select Automatic in the Startup Type section so that it is always available even after a restart of the computer or server.
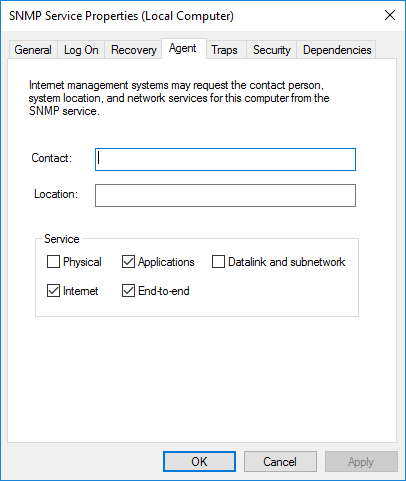
On the Agent tab, be sure to select all the services required by the monitoring tool to collect the data.
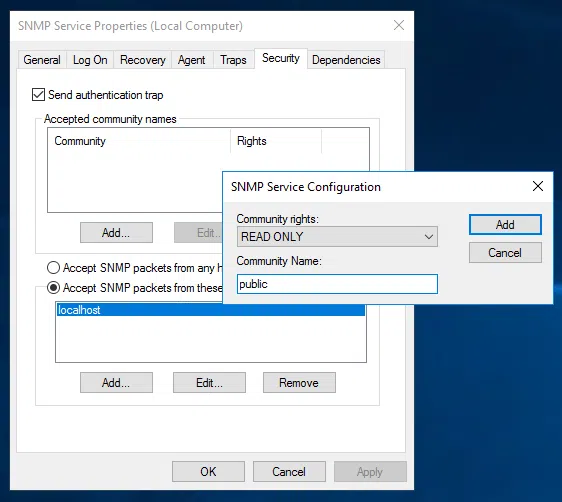
On the Security tab, click the Add button to add the community string, read-only, and the hosts from where SNMP packages will be accepted.
That’s it. Now, the installation and configuration of the SNMP service in Windows 10 and Windows Server 2016 are complete.



Very helpful all on a single page. ty
I thought this was an article on installing, configuring snmp via AD group policy. Nothing like that at all.
Thank you, this was “easy peasy”.
FYI :
Windows 10 Build 1809 Does have a bug in it that does not show the SNMP Services, This is the FIX for this issue :
Open Powershell with Administrator credentials
issue the following commands
Get-WindowsCapability -Online -Name “SNMP*” –> Will show Not Present
Add-WindowsCapability -Online -Name “SNMP.Client~~~~0.0.1.0”
Get-WindowsCapability -Online -Name “SNMP*”
Get-WindowsCapability -Online -Name “SNMP*” –> Will show Installed
The feature still does not show in the turn windows features on or off window however the service is installed and you can view and configure from services.msc I have verified that the service works as expected.
I would have liked to see the configuration via CLI as well. I was really entrigued in learning this when I saw the install commands …