• Contact
  • Homelab
Dimitris Tonias
  • Management
  • Monitoring
  • Cloud
  • Virtualization
  • Networking
  • Productivity
No Result
View All Result
  • Management
  • Monitoring
  • Cloud
  • Virtualization
  • Networking
  • Productivity
No Result
View All Result
Dimitris Tonias
No Result
View All Result

Add hard disk to Windows VM on VMware Workstation

Dimitris Tonias by Dimitris Tonias
September 6, 2017 - Updated on April 21, 2024
in Virtualization
Reading Time: 4 mins read
A A
0
Share on FacebookShare on Twitter

As you use virtual lab on VMware Workstation, you may need to add additional virtual hard drives to try features such as virtual RAID, Storage Spaces,

In today’s article, we’ll see how to add a new virtual disk as virtual hardware, and what actions you need to follow later in order for the disk to be recognized through the Windows or Windows Server environment.

Add a new virtual disk to a Windows VM

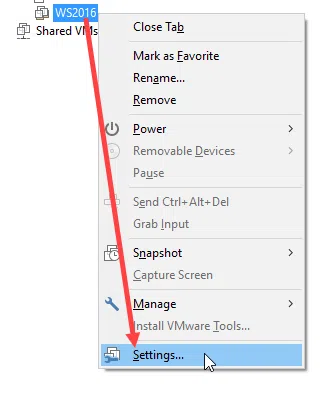
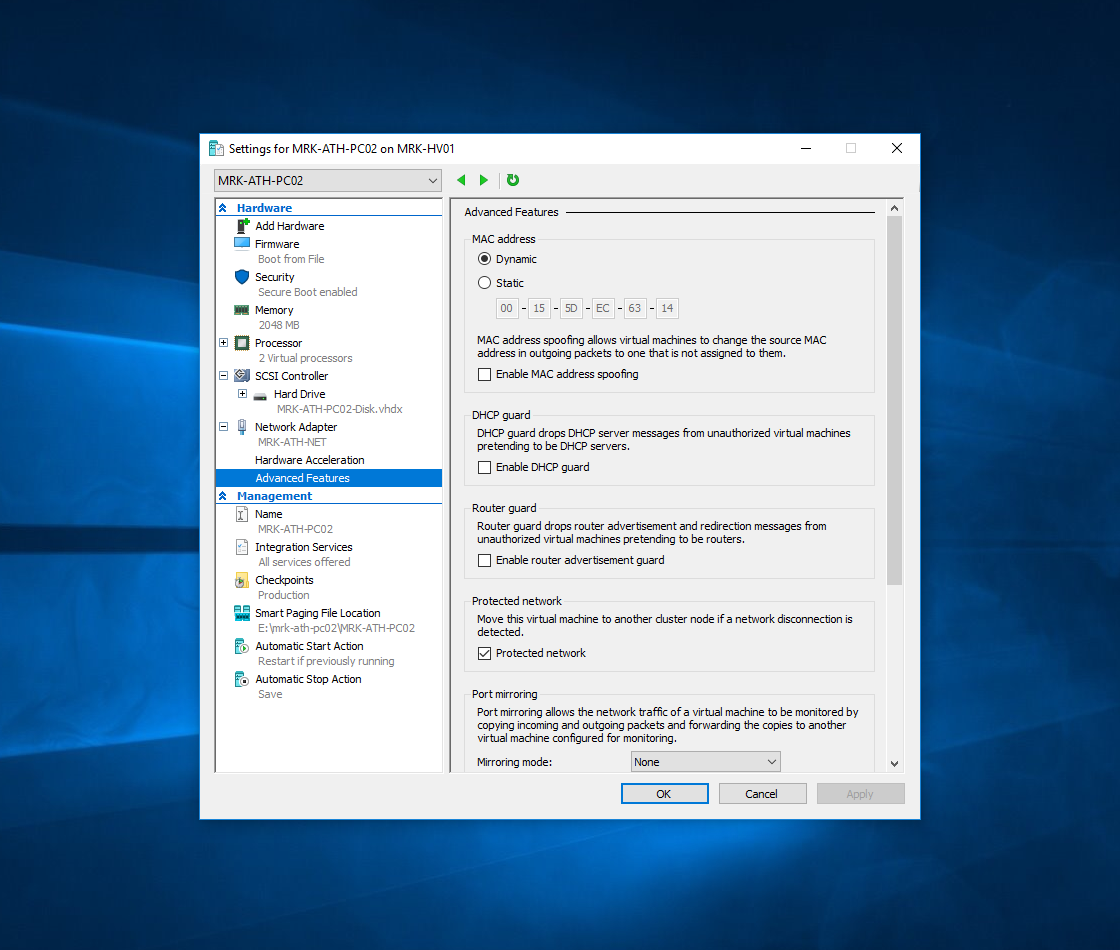
Right-click VM and then Settings to open the VM settings window.

Add hard disk to Windows VM on VMware Workstation

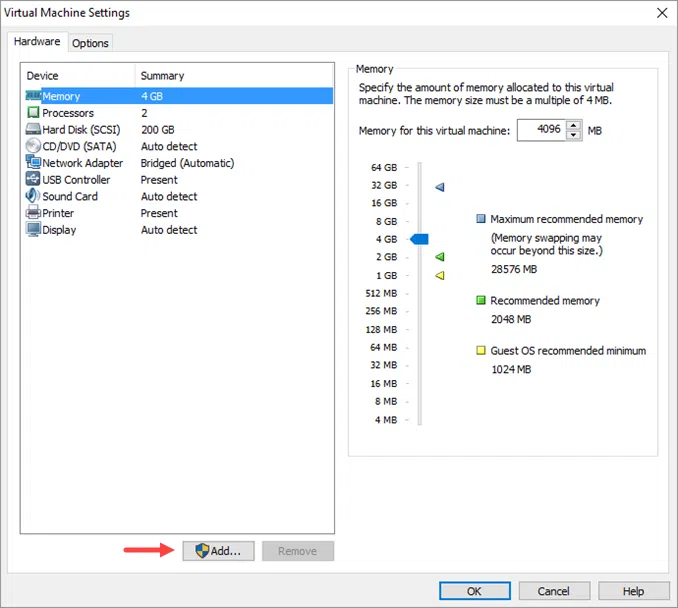
Click the Add button at the bottom.

Add hard disk to Windows VM on VMware Workstation

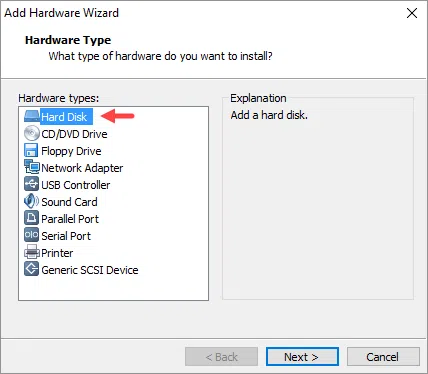
Select Hard Disk from the list and click Next to continue.

Add hard disk to Windows VM on VMware Workstation

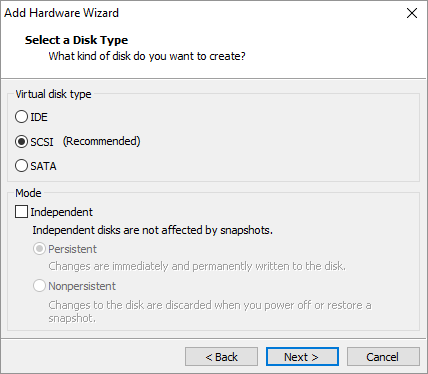
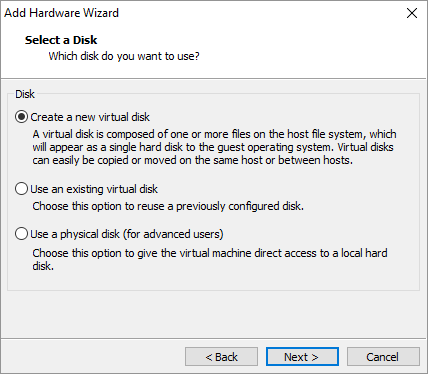
Choose the type of virtual disk based on your needs and whether it will work independently of the snapshots you create.

Add hard disk to Windows VM on VMware Workstation

Enable the Create a new virtual disk option and click Next to continue. As you will see, you can use an existing virtual disk or even a ‘physical’ hard disk that we might see in a future article.

Add hard disk to Windows VM on VMware Workstation

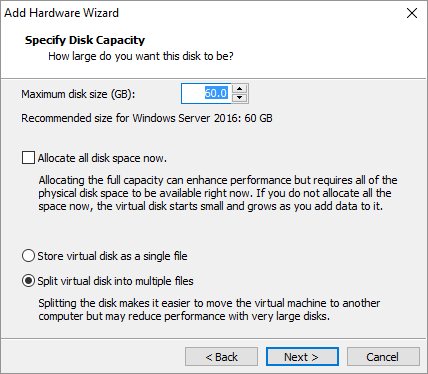
Choose the maximum space that the virtual disk will occupy and whether it will be divided into tracks or a single file.

Add hard disk to Windows VM on VMware Workstation

Select a name for the virtual disk file and its storage location (if you do not want the default).

Add hard disk to Windows VM on VMware Workstation

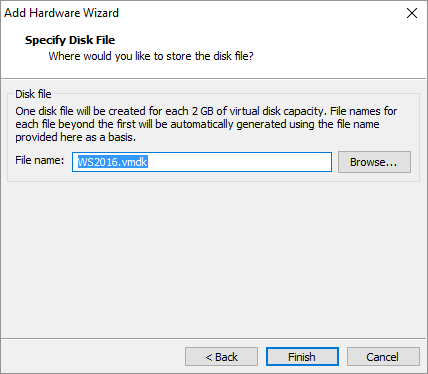
Finally, clicking the Finish button creates the new virtual disk.

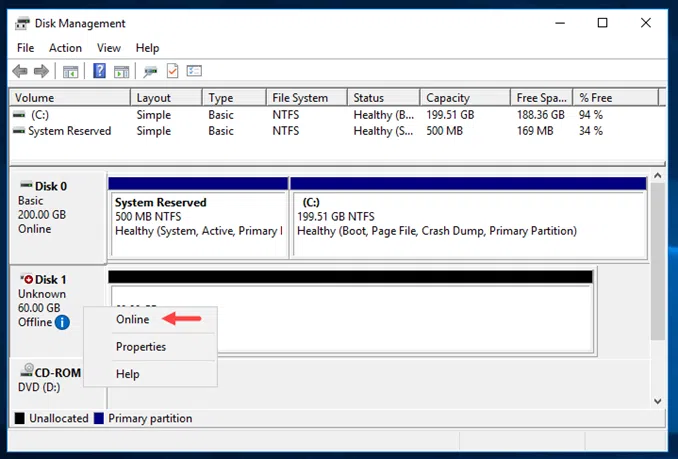
However, we have not finished here. We will need to configure the disk so it can be recognized by Windows. The following steps are not necessary for everyone.

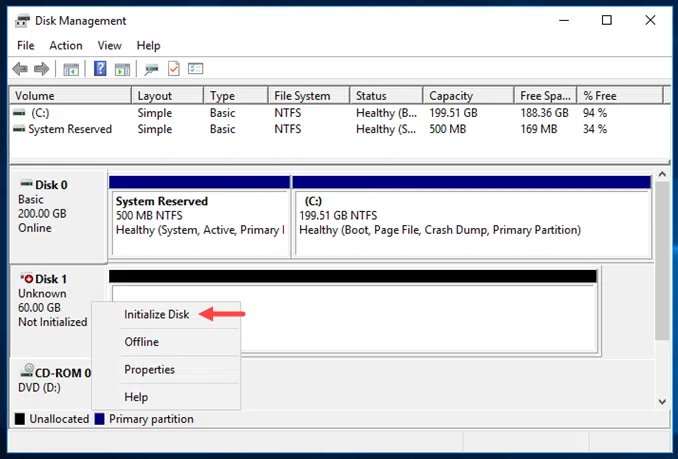
Open the Disk Management window. Here, you will notice that there is now a new disk that has Offline status. Right-click the disk, and then click Online.

Add hard disk to Windows VM on VMware Workstation

Then, right-click on the disk again and select Initialize Disk.

Add hard disk to Windows VM on VMware Workstation

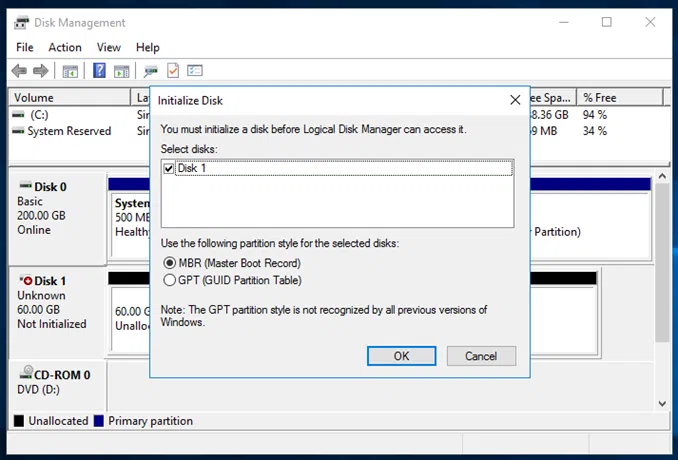
In the new window, make sure that the disk is selected, choose between MBR or GPT and click OK.

Add hard disk to Windows VM on VMware Workstation

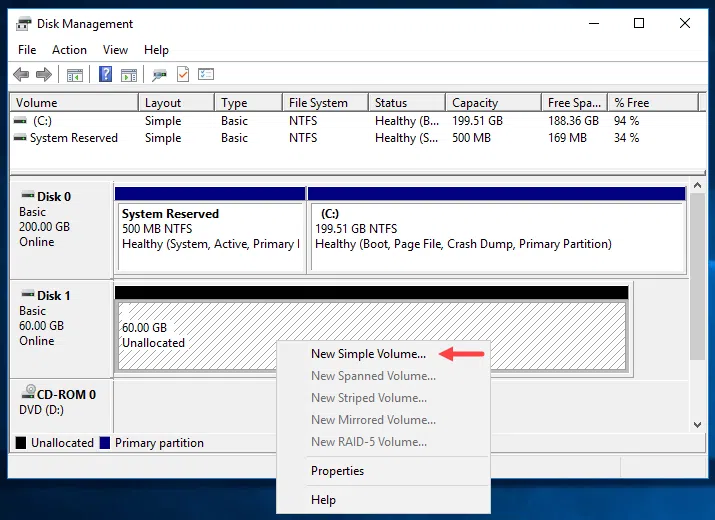
At this point, the disk can be recognized by the system, however, because no partition has been created yet will not appear in the Windows Explorer File Explorer. So, you can create immediately after the first partition of the virtual disk by following the steps below.

Click the unallocated disk space box and then New Simple Volume.

Add hard disk to Windows VM on VMware Workstation

The wizard will create a new volume on the disk. Click Next to continue.

Add hard disk to Windows VM on VMware Workstation

Select the size of the partition you are creating. Leave the default value if you only want a partition for the entire disk.

Add hard disk to Windows VM on VMware Workstation

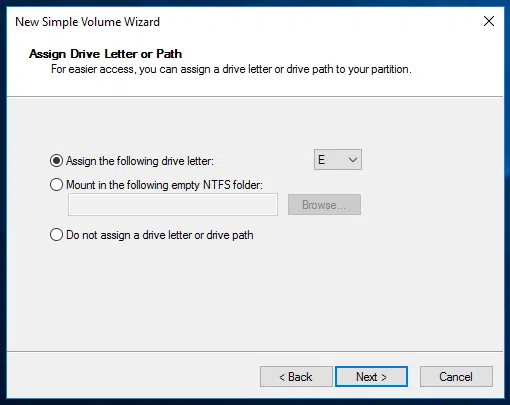
To display it in File Explorer, you will need to assign a drive letter to it, so select the Assign the following drive letter option by selecting the letter you want.

Add hard disk to Windows VM on VMware Workstation

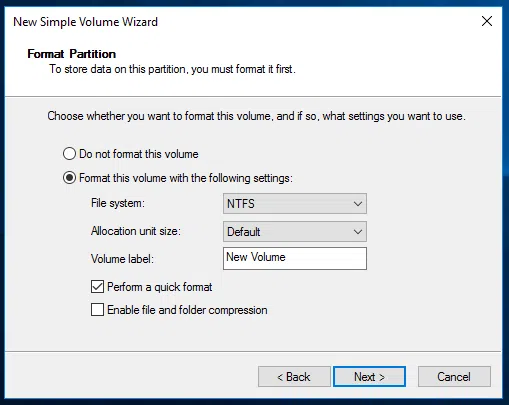
Here, you can configure the virtual disk file system. For most, NTFS is the best choice. Be sure to type a name for your new drive and click Next to continue, keeping the other default settings.

Add hard disk to Windows VM on VMware Workstation

Finally, click Finish to complete the process of creating the new volume on your virtual disk. Within a few seconds, the disk will be ready to use.

Add hard disk to Windows VM on VMware Workstation

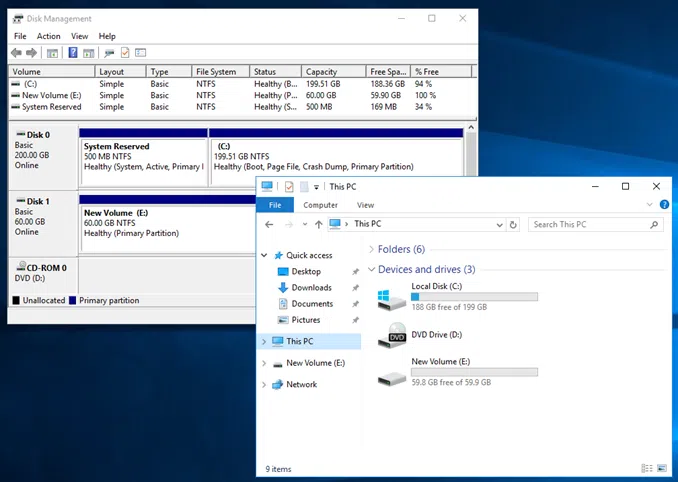
By opening File Explorer you will see that it is now displayed with the drive letter you previously selected.

Add hard disk to Windows VM on VMware Workstation

Tags: Hard DiskVirtual MachineVMware Workstation
ShareTweetPin
Previous Post

Sync PDF files across devices with Adobe Reader

Next Post

Increase virtual machine’s hard disk space on VMware Workstation

Related Posts

Altaro VM Backup Review
Virtualization

Altaro VM Backup Review

Configure dynamic MAC addresses on a Hyper-V 2016 host
Virtualization

Configure Dynamic MAC addresses on a Hyper-V 2016 host

Set static MAC address on a Hyper-V Server 2016 VM
Virtualization

Set static MAC address on a Hyper-V Server 2016 VM

View MAC address of Hyper-V Server VMs
Virtualization

View MAC address of Hyper-V Server VMs

Install Hyper-V Server 2016 as a Standalone Hypervisor
Virtualization

Install Hyper-V Server 2016 as a Standalone Hypervisor

Find which virtual machines use Dynamic Memory on Hyper-V
Virtualization

Find which virtual machines use Dynamic Memory on Hyper-V

Leave a Reply Cancel reply

Your email address will not be published. Required fields are marked *

No Result
View All Result
Zabbix server: More than 75% used in the trends cache
Monitoring

Zabbix server: More than 75% used in the trends cache

In Zabbix, "trends" are a type of data storage representing aggregated historical data. Zabbix monitors and collects a vast amount...

Read moreDetails
Check word count on Google Docs

Check word count on Google Docs

Zabbix server: More than 75% used in the configuration cache

Zabbix server: More than 75% used in the configuration cache

Approve updates in WSUS 2016

Approve updates in WSUS 2016

Configure Group Policy to deploy updates using WSUS 2016

Configure Group Policy to deploy updates using WSUS 2016

Configure computer groups in WSUS 2016

Configure computer groups in WSUS 2016

The initial configuration of WSUS 2016

The initial configuration of WSUS 2016

Get more stuff

Subscribe to our mailing list and get interesting stuff and updates to your email inbox.

Thank you for subscribing.

Something went wrong.

we respect your privacy and take protecting it seriously

  • Contact
  • Homelab

© 2024 Dimitris Tonias

No Result
View All Result
  • About
  • Contact
  • Free Tools
  • Home
  • Homelab

© 2024 Dimitris Tonias

This website uses cookies. By continuing to use this website you are giving consent to cookies being used.