Let’s say we already have a Windows Server VM on VMware Workstation with a total disk space of 30 GB. However, we have decided to test the WSUS functionality, which means we will need a lot of available GB space to download the updates we choose. Our options, in this case, are either to add a new separate virtual disk to VM or to extend the existing disk to meet our requirements.
In this article, you will see how to extend the existing disk capacity using VMware Workstation.
Note 1: To proceed with the steps below, the VM should be powered off.
Note 2: If you have saved snapshots you can not expand the space. You will need to delete them first and then proceed.
Note 3: If your VM is a linked clone, you can not expand the space.
Increase hard disk space in a Windows VM
Right-click VM and then Settings to open the VM settings.

Go to the Hard Disk section and click the Expand button. These options are disabled when the VM is powered on.

In the new window, type the new total capacity of the VM hard drive and press the Expand button.

Expansion completed. As the message tells you, you’ll need to expand the disk capacity through the operating system, that is, Windows Server.

Click OK to close all windows and start the VM.
After logging in to your account, open Disk Management. As you will see, on the disk on which the operating system is installed, an unallocated space has now been created that was essentially created by the expansion function previously.
Right-click the disk and then Extend volume from the menu.

Then, the Windows Extend Volume Wizard will start. Click Next to continue.

Select the free space available and click the Add button so that the next step is added as an extension to the existing disk.
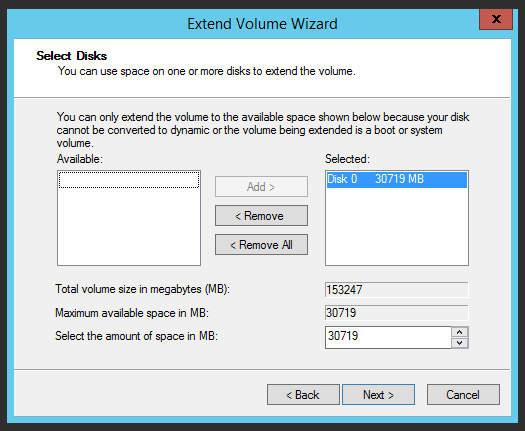
Finally, click Finish to complete the process.

That’s it!
Now by opening File Explorer, you will see that the capacity of your VM hard drive has increased to the value you previously selected.


