In today’s article, we will see a typical installation of Windows Server 2016 Desktop Experience, the ‘full’ version including the graphical user interface (GUI).
Before the installation
I mention the following for typical reasons as it is not self-evident for everyone.
- Check the system requirements and instructions given by Microsoft.
- Download the Windows Server 2016 installation ISO from the Evaluation Center, if you like.
- If you are going to install it on a physical machine then you have to burn it to a DVD or a USB flash drive. Personally, I prefer to do it with Rufus.
- You must select the DVD or USB as the boot device in the BIOS/UEFI settings.
Install Windows Server 2016 with GUI (Desktop Experience)
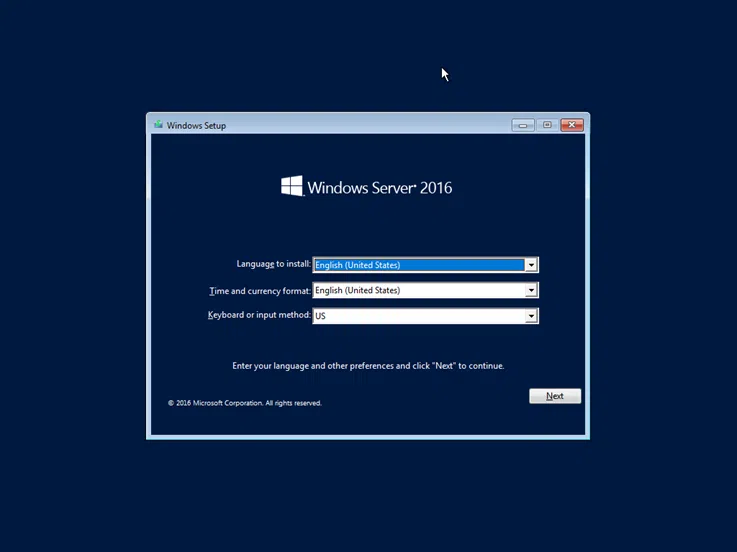
Select Language, Time, and keyboard language and click Next to continue.
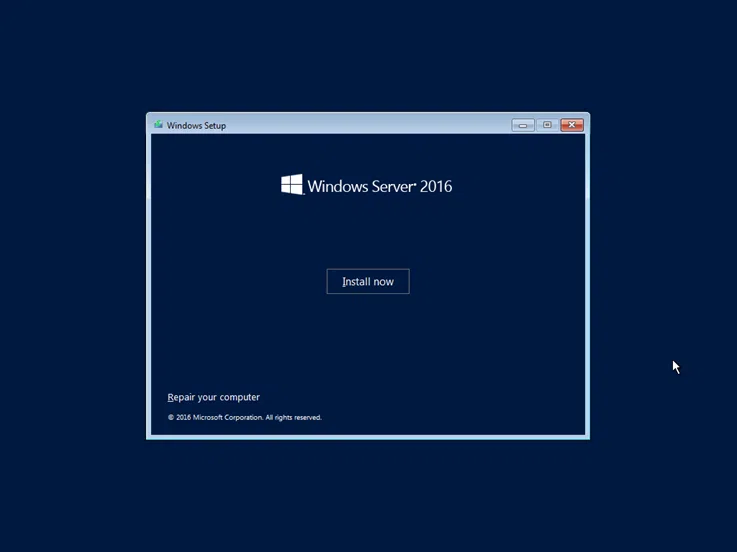
Click the Install now button to continue.
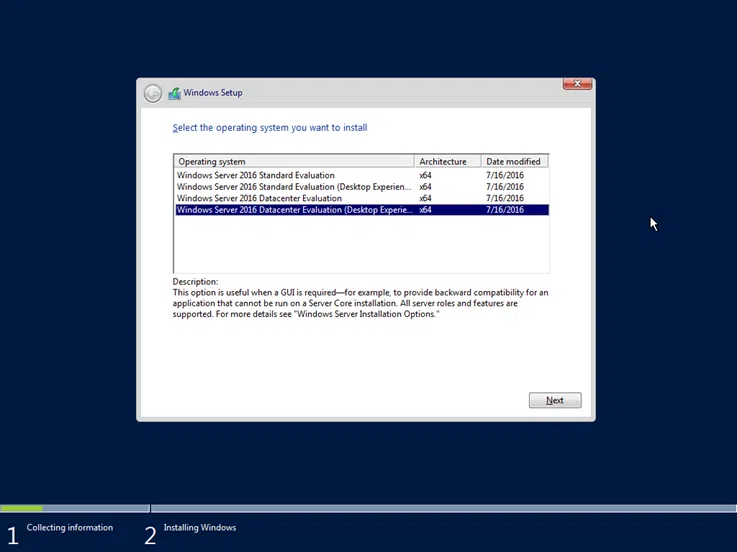
Here, select the version of Windows Server 2016 you are about to install. What you need to keep in mind is selecting the Desktop Experience version, which means the version with the graphical interface will be installed.
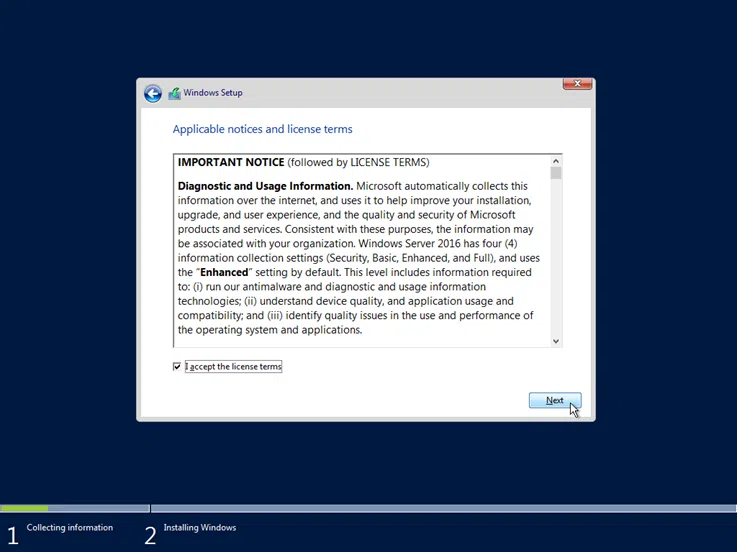
Accept the terms of use by selecting I accept license terms option and click Next to continue.
Since it is a clean installation rather than upgrading a previous version, click Custom: Install Windows only (advanced).

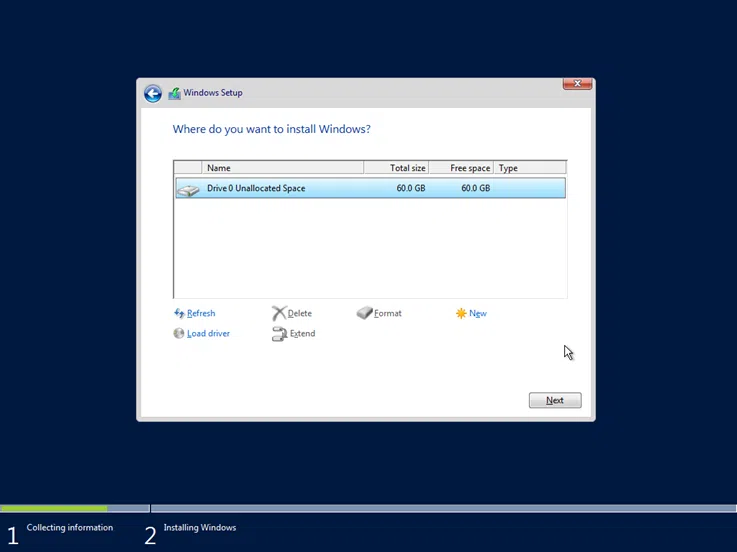
Select the disk to be installed in Windows Server 2016. At this point, you can create different partitions as well as load the respective drivers for the drives as long as required by the manufacturer. In a typical installation, you do not have to do anything more than simply selecting the disk.
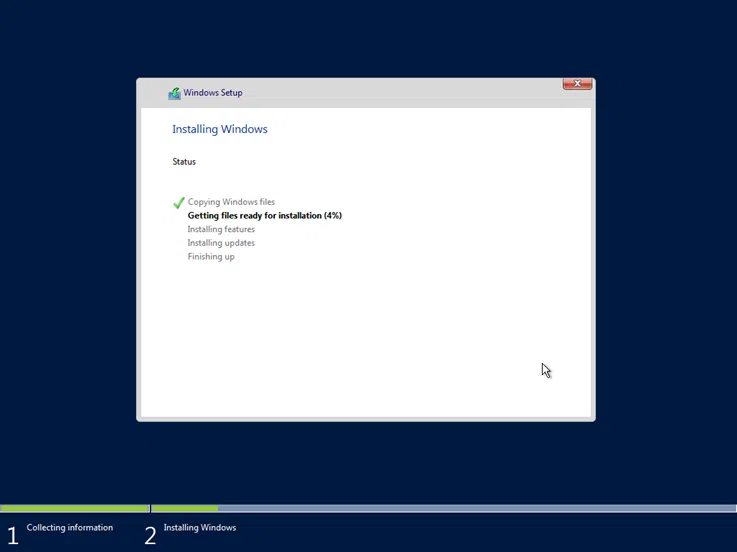
The installation of Windows Server 2016 is in progress. You will have to wait a few minutes.
After restarting the server, you will be prompted to type the local administrator account password. Ensure that the password meets the basic complexity requirements.

Immediately after, the last actions will be performed and you will be ready to use Windows Server 2016. As you can see, by pressing the Ctrl + Alt + Delete key you can connect to the local administrator account you created in the previous step.

That’s it!
After you’ve finished installing Windows Server 2016, you can go ahead with some of the basic settings you’ll need to do first. Indicatively, the most common are:


